RAVENWING TALONMASTER JETBIKE CONVERSION STEP BY STEP
by bish · Published · Updated

Hello all,
I’ve finally had a chance to sit down and create this step-by-step on how I made my Ravenwing Talonmaster Jetbike Conversion. This tutorial will show you how to use the Ravenwing robed legs and bodies as well as the Ravenwing bike handle bars with the Adeptus Custodes Vertus Praetors Jetbikes.
First off here is a list of the bits and tools I used while making the conversion.
Items marked with an asterix * can come from multiple sources.
Vertus Praetors Sprue
- Jetbike Pieces
Ravenwing Accessory Pack Sprue
- Twin Assault Cannons
- Robed Body and Legs*
- Power Sword*
- Backpack*
- Heads*
- Shoulder Pads*
- Ravenwing Symbols
- Purity Seals
Ravenwing Command Squad Sprue
- Handlebars
- Robed Body and Legs*
- Heads*
- Shoulder Pads*
- Power Swords*
- Arms*
Misc
- Heavy Bolters from Stormwolf/Stormfang kit, Or the Stormraven kit
* There are multiple sources for bits that will work.
Tools
- X-acto Knife and blades
- Liquid Plastic Glue I prefer Tamiya Extra Thin Cement which can be bought at Hobby Town or Hobby Lobby.
- Super Glue
- Various hobby files
- Clippers
- Green Stuff
- Green Stuff Tool
- Blu-tak
STEP-BY-STEP
(Click the images for a higher resolution view)
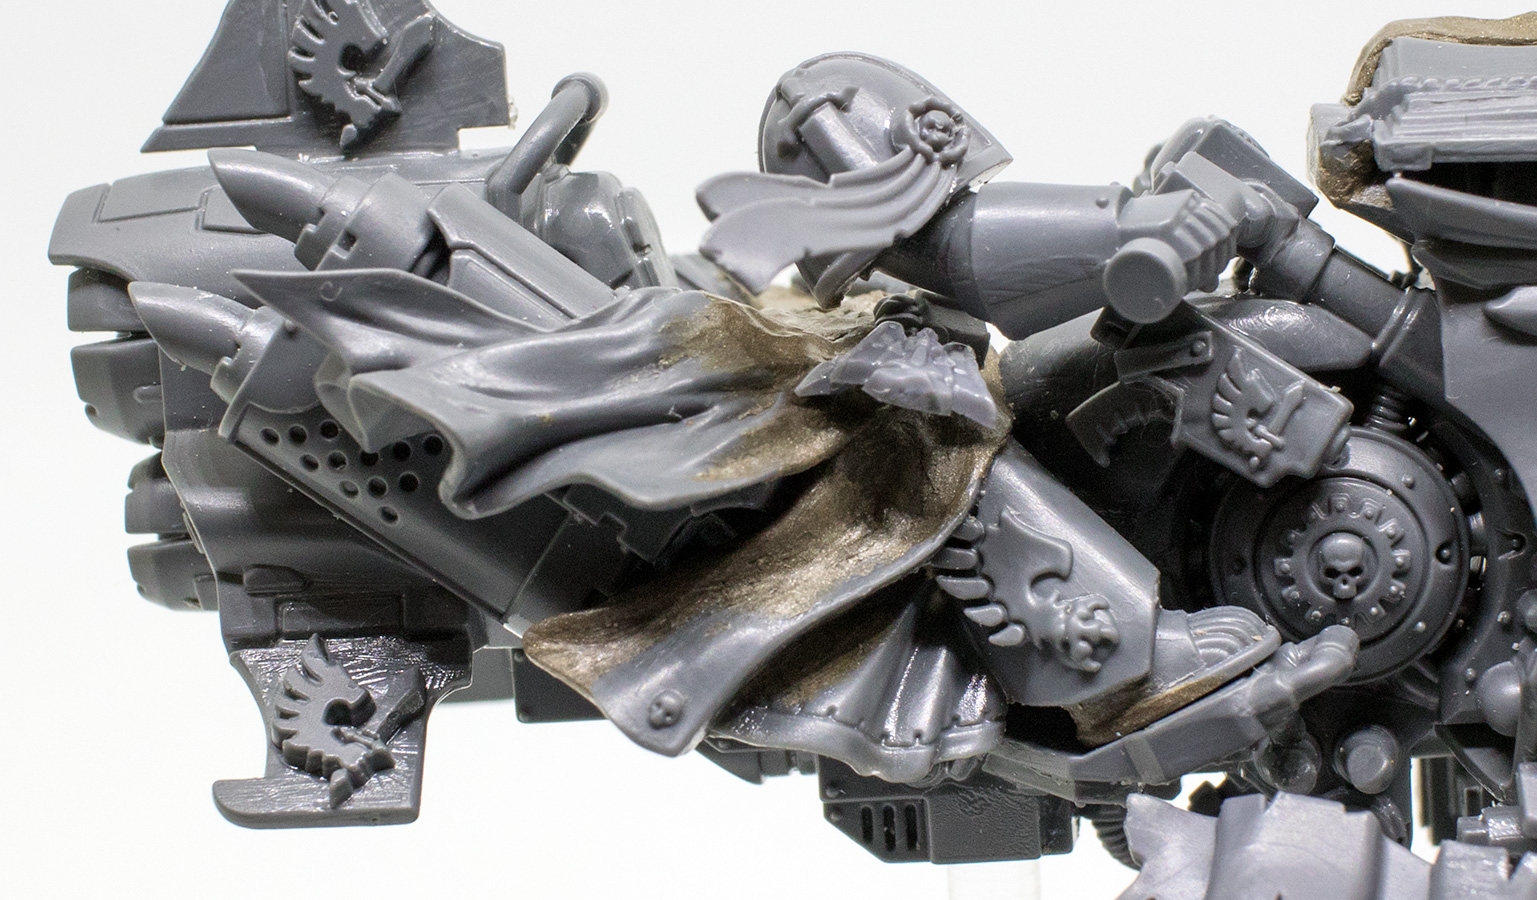
One of the first problems you run into with making the Ravenwing robed bodies work is that the Jetbike is too wide for the legs to fit correctly.
First you need to thin down the Jetbike a little using a hobby knife or a file.
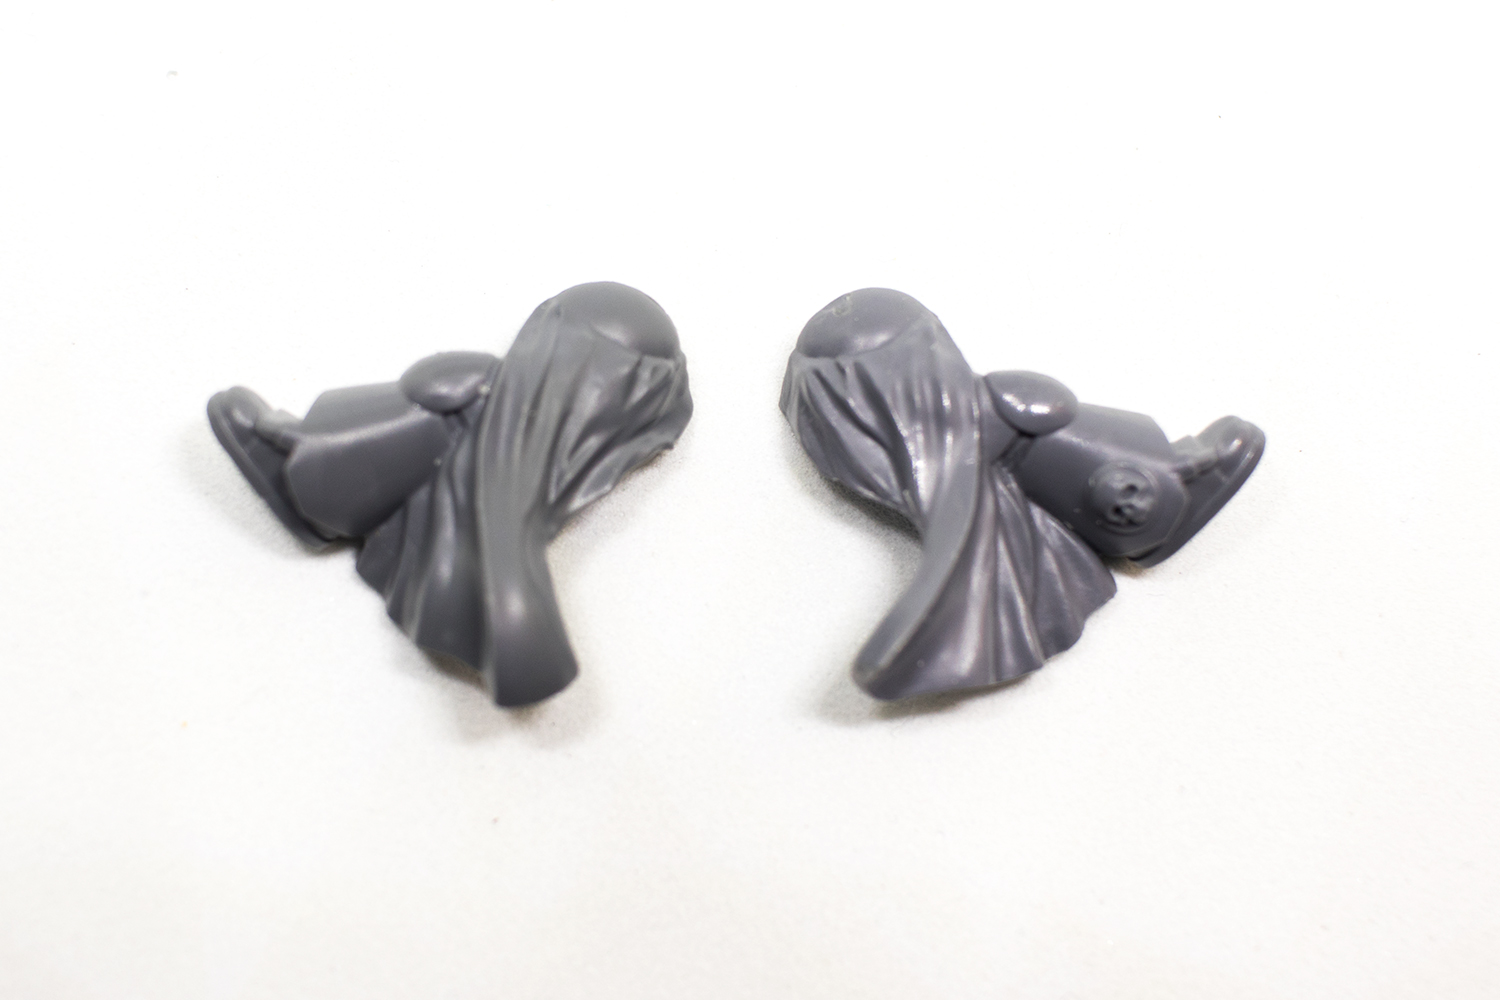
You will also need to thin down the insides of the robed legs, checking the fit against the Jetbike as you do that. These legs are from the Ravenwing Accessory Pack Sprue, and frankly are the easiest for this conversion.
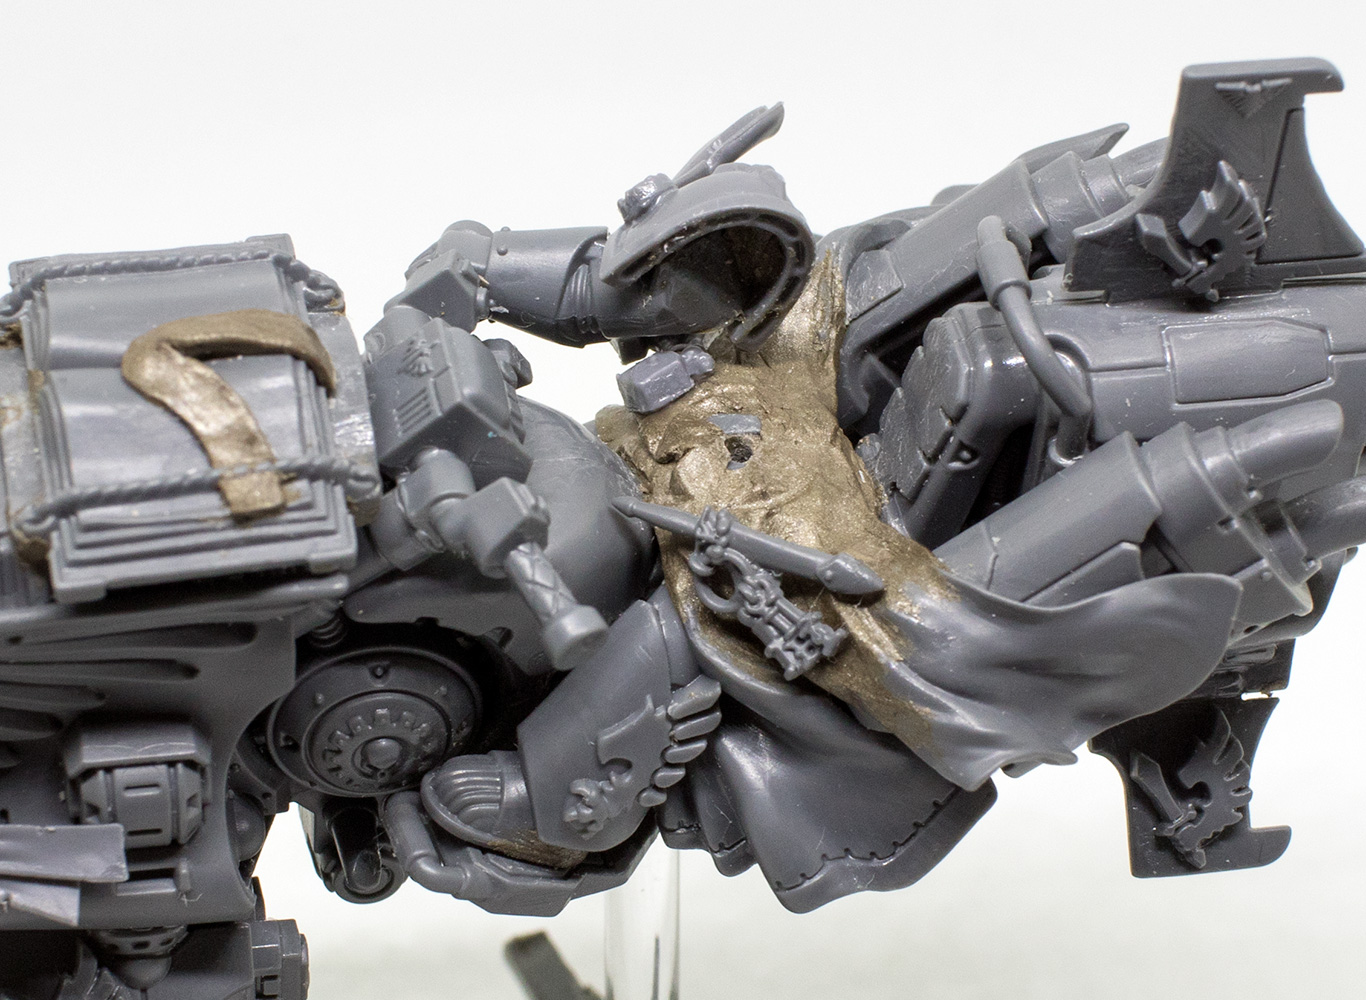
You can also use the robed legs from the Ravenwing Command Squad Sprue, however they are more difficult to fit and there will be some greenstuff sculpting required to make them look right, as well as adding to the foot so that it sits flat on the Jetbike foot rests. I’m not going to be covering sculpting robes in this step-by-step, however you can probably find some great tutorials if you search online.
A note: I have not tried to use any non-robed Space Marine biker legs with this conversion. The robes conveniently cover up the area on the jetbike that you need to thin, so the detail removed is not seen. However I do not know if that will be the case with non-robed Space Marine biker legs.
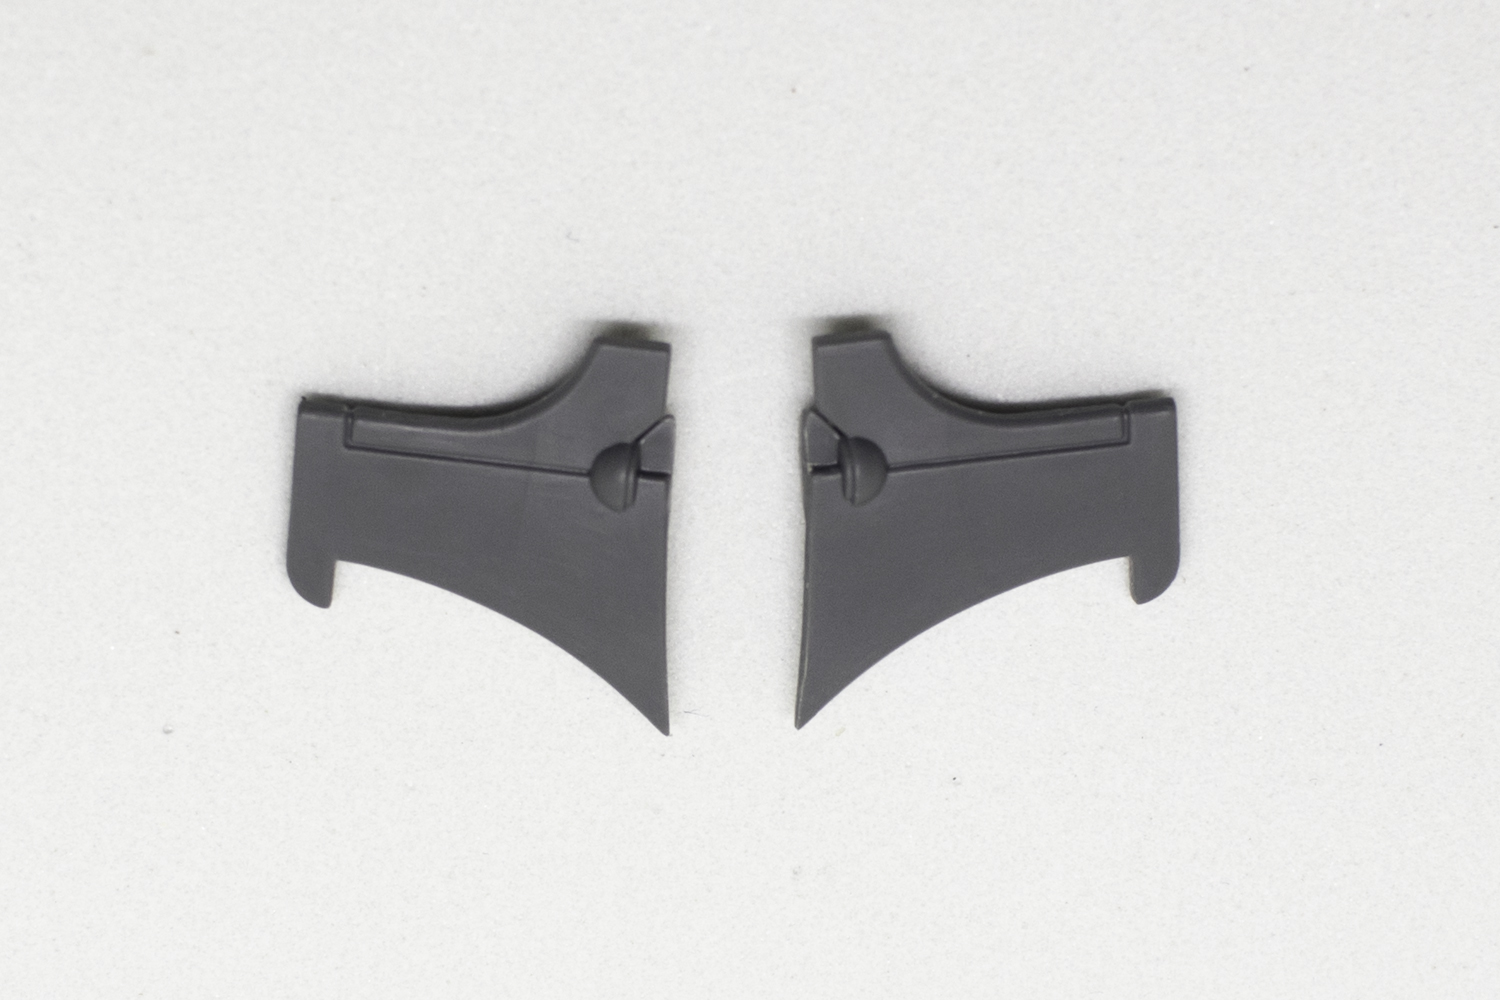
The next step involves positioning the foot rest back a little and closer to the Jetbike body. Here is what the foot rests look like before they have been modified.
And here are the foot rest after they have been modified. You can use clippers or a hobby knife to modify the foot rests.
When you attach the foot rests with glue, position them a little farther back than they would normally sit. You want the first pole coming out of the front of the foot rest to connect with the 2nd pole on the Jetbike as shown in the pictures below. Always dry fit your pieces first to make sure they are in the right position before gluing.
You can also use the robed legs you have already modified to makes sure the foot rests are in the right position. I use blu-tak to keep the legs in place while dryfitting.
Here are the footrests with the legs from the Ravenwing Accessory Sprue.
And with the legs from the Ravenwing Command Squad Sprue.
Now that you have the legs and the foot rests in the right position, the next step is to fit the handle bars from the Ravenwing Command Squad Sprue to the Jetbike. Unfortunately the handlebars that come with the Jetbike would require a lot more modification than I think it is worth. And using the bike handlebars will look more like the handlbars on Sammaels Jetbike Corvex.
First you will need to trim back the poles that the handle bars sit on. Here are the handlebar poles before trimming.
And After being trimmed.
You want to trim them to the end of the largest width piece as shown in the photos.
You may also need to trim the little nub on the bottom of the Handlebars themselves. Then with the torso you plan to use, with the backpack attached, dry fit the the handle bars onto the Jetbike’s poles, making sure the arm and torso line up correctly. Then glue the handlebars in place as shown below. You may need to hold the handlebars in place until the glue sets to get it right. One of the reasons I use the Tamiya plastic glue is that it melts the plastic well creating a strong bond when dry.
If you find that the backpack is hitting the back seat of the bike and pushing the torso too far forward, you can try using a backpack with a thinner bottom part or you can shave a little off the seat. You won’t notice it when the model is all put together. One tip I have is that you can use a thin coat of liquid plastic glue to smooth out places you have scraped like the seat in the photo below. The Tamiya glue I listed above is great for this.
Now that our Space Marine fits on the bike, we can move on to the weapon load out. Since this is a counts as model for the Talonmaster it will need Twin Heavy Bolters and Twin Assault Cannons. I used Heavy Bolters from the Stormwolf/Stormfang kit, I bought those bits individually on ebay. The Twin Assault Cannons are from the Ravenwing Accessory Pack Sprue.
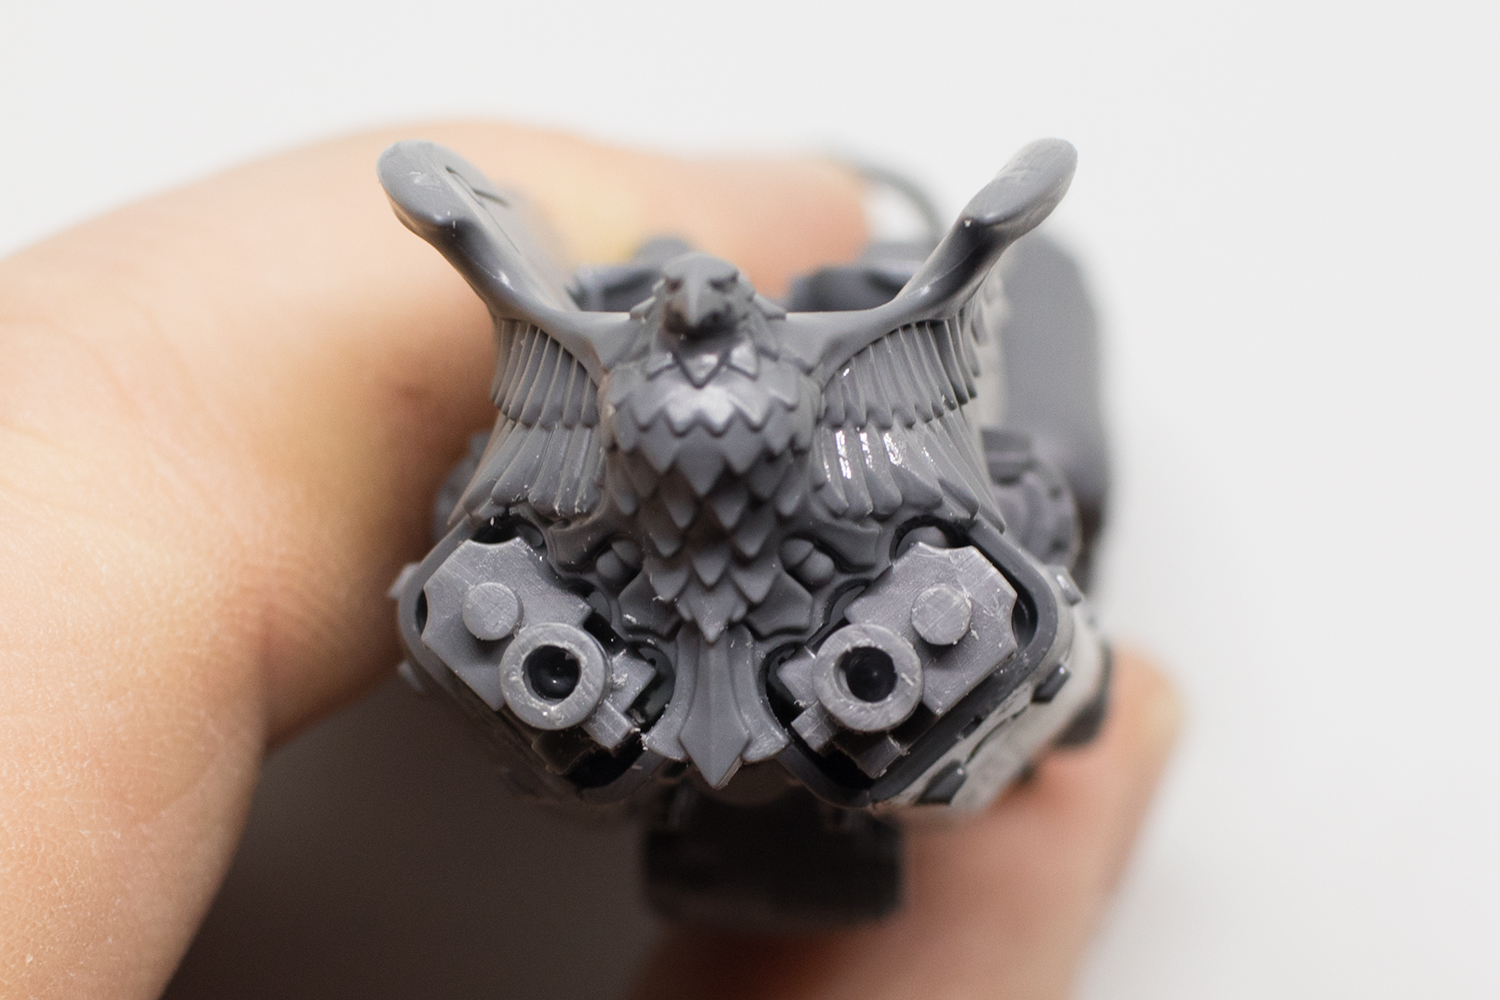
The Heavy Bolters fit pretty good into the front of the jetbike where the Hurricane Bolters would normally sit. The only modification you need to do is to file down the pointy parts on the bottom of the Eagles Tail.
Then glue in the Heavy Bolters as shown below.
You will now want to remove the nubs that are on the bottom of each side of the front of the Jetbike body where the front wings attach, this will allow you to attach the Assault Cannons to the underside of the wings.
Here are before and after photos.
You will also want to remove the nubs on the front wings that correspond to the nubs on the body.
Here are before and after photos.
Then attach the front wings, there should still be a little round divet to help you fit them correctly.
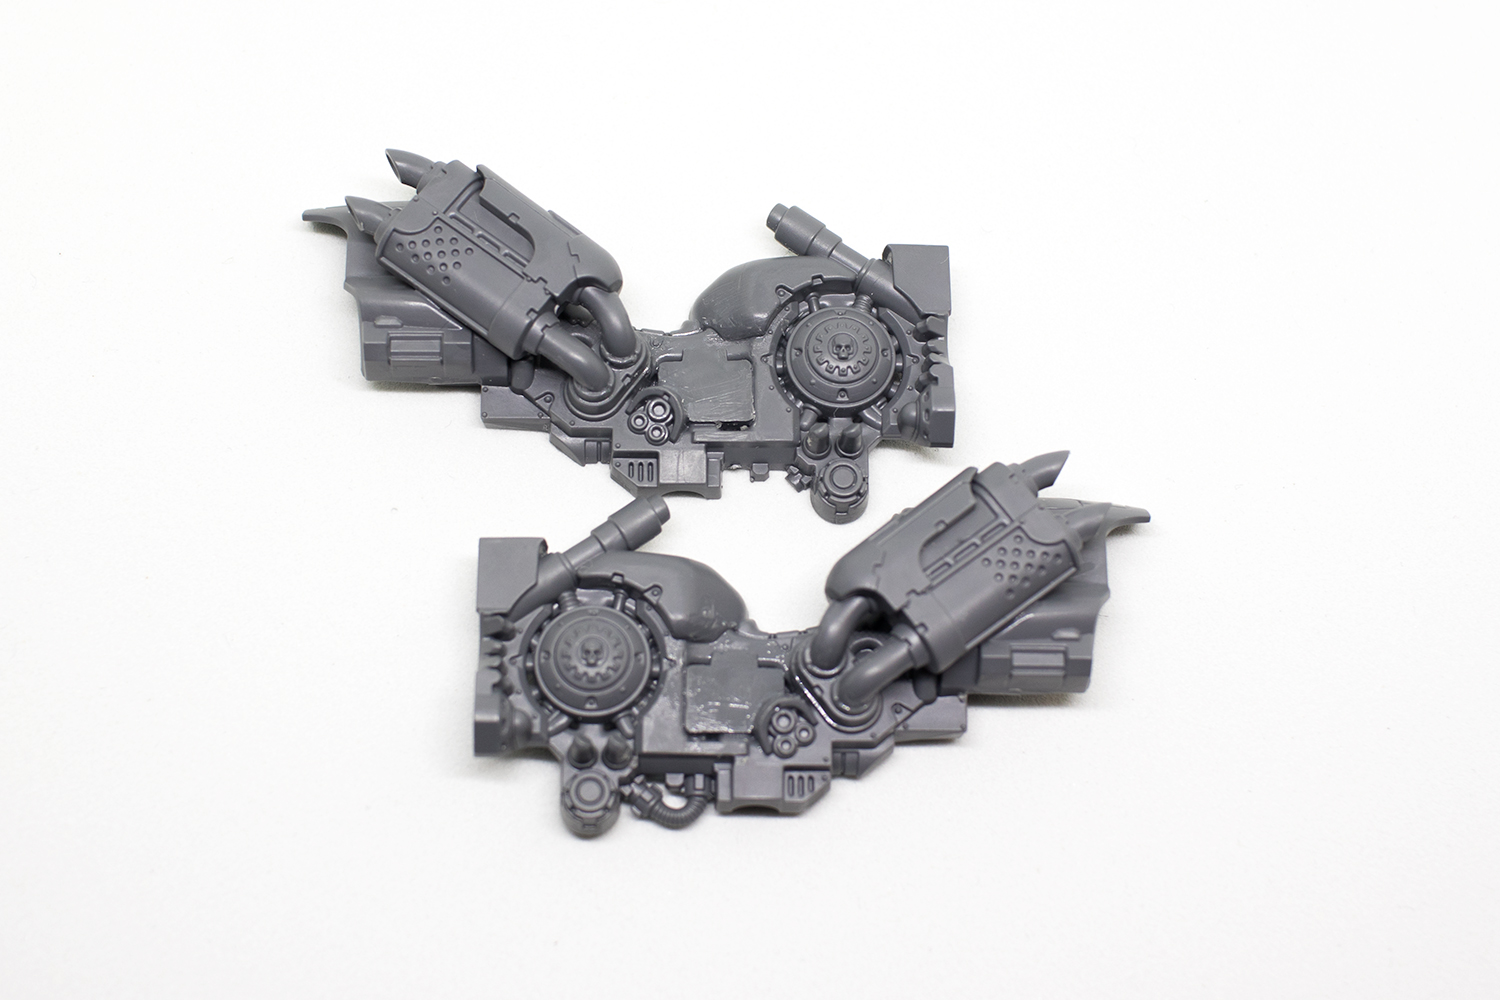
So first you need to thin down the jetbike a little.
| Album | Ravenwing Talonmaster SBS |
| Category | Modeling |
Now you can attach the Assault Cannons, with the ammo box inwards, to the underside of the wings. This may take some adjusting to get the Assault Cannons level and not pointing inward too much. The Tamiya liquid plastic glue really helps in attaching these. I try to line up the ammo box with the three nubs on the underside of the jetbike.
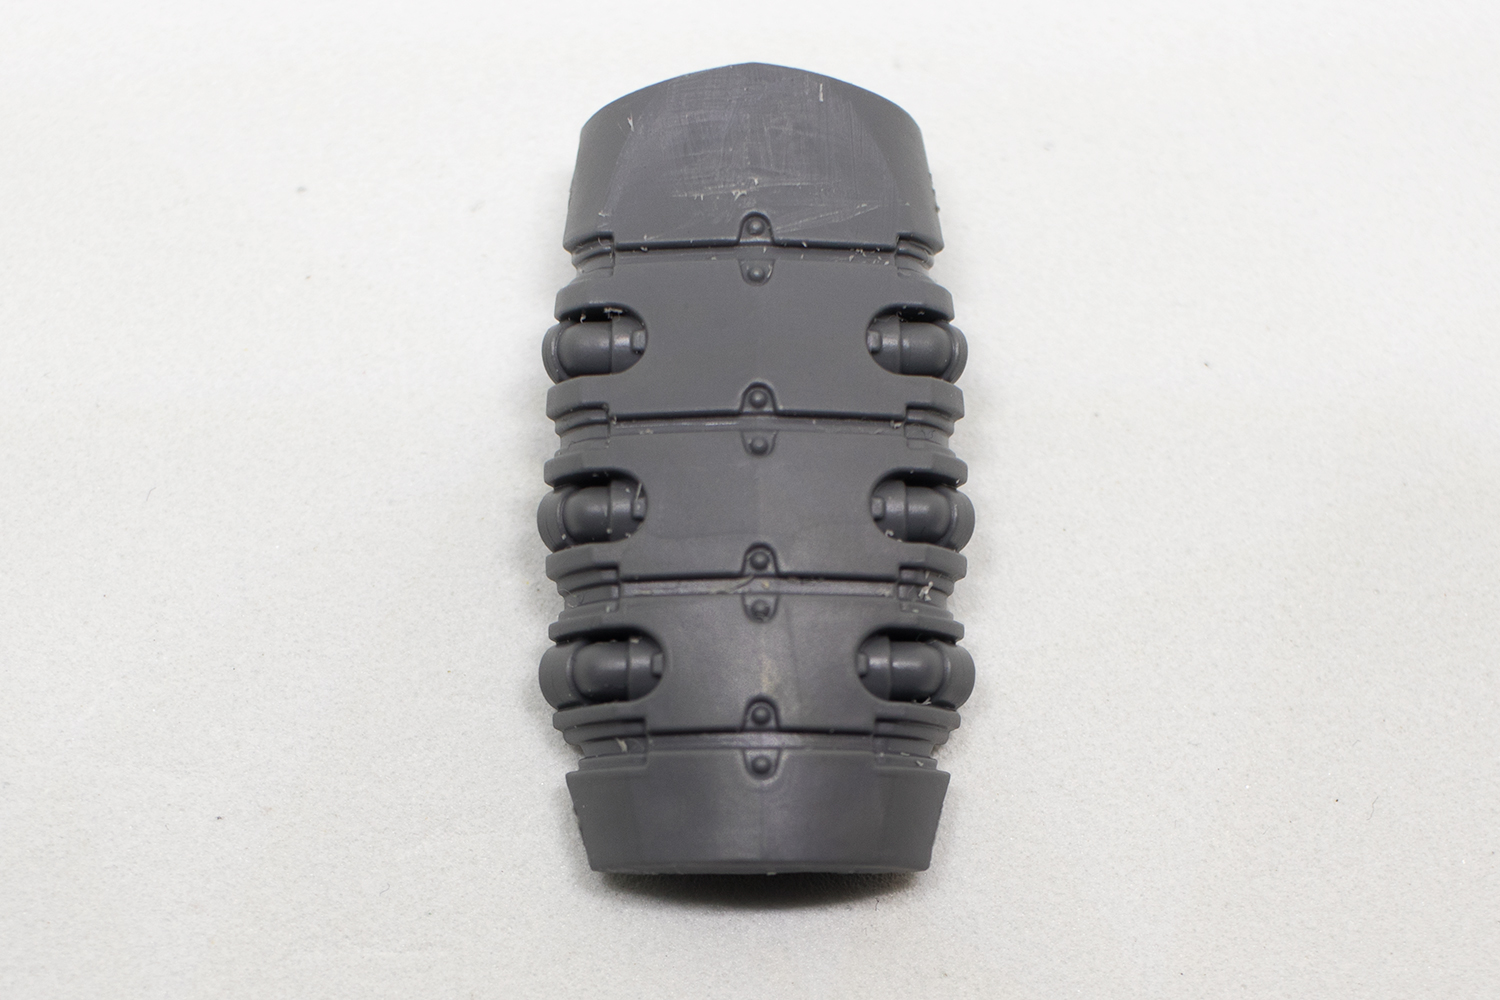
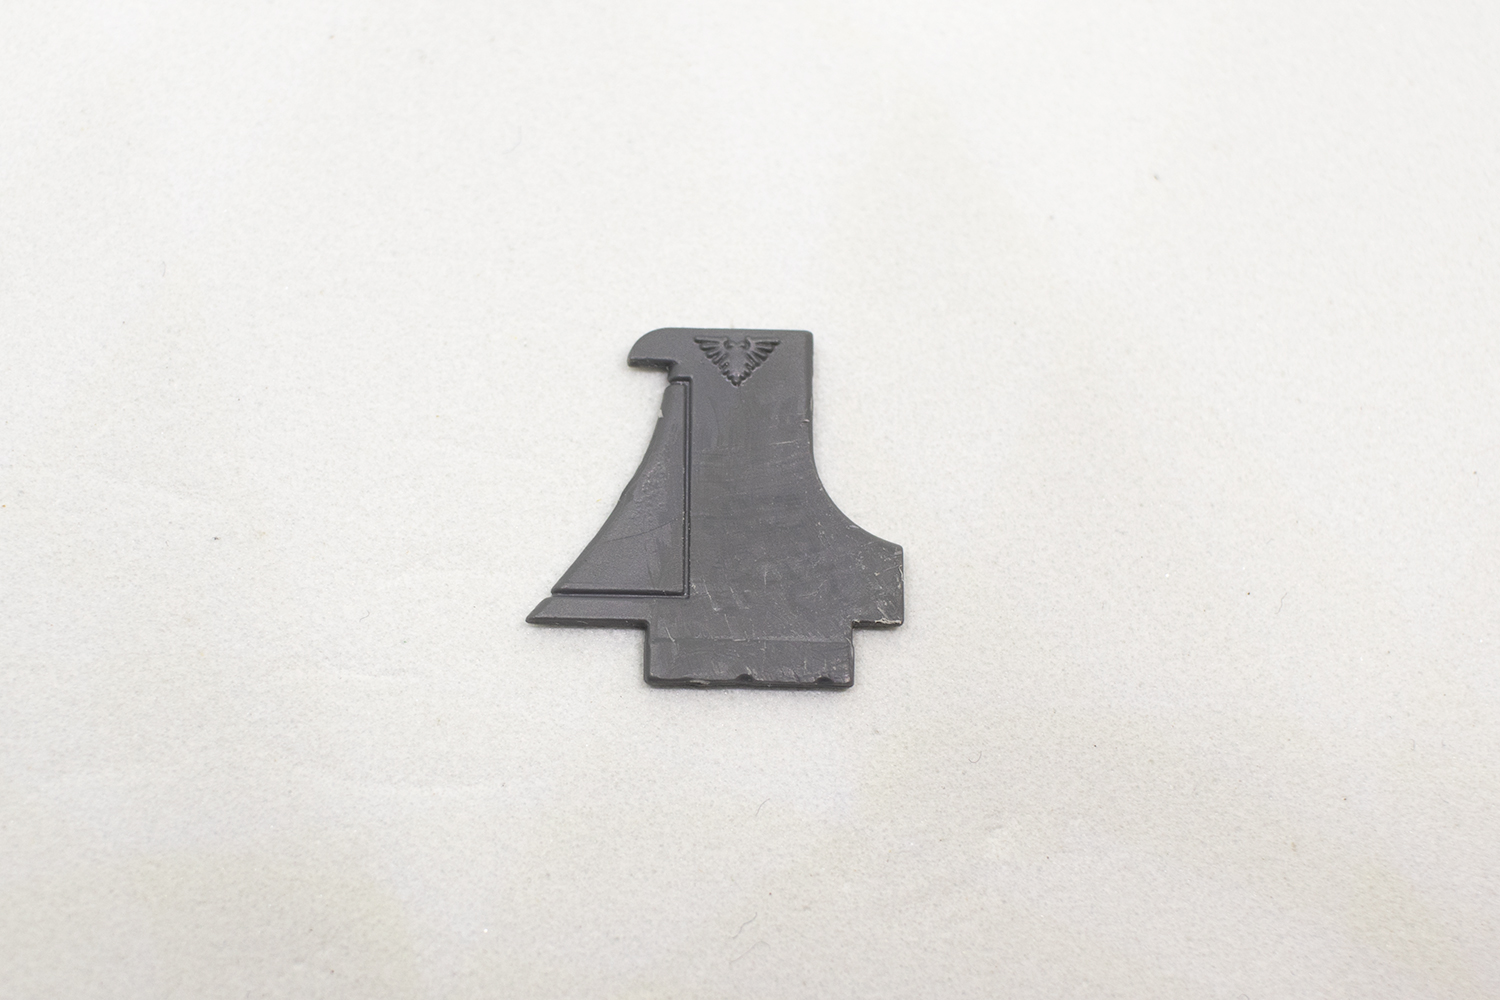
Lastly you will want to remove the symbols from the back wings and the front of the engine top using files or a hobby knife.
To get the engine top to fit with the new handlebars you will also want to remove the piece at the back end of the engine top.
Now you can assemble the pieces of the Jetbike that are left over and add the small Ravenwing symbols from the Ravenwing Accessory Pack to the wings where you removed the other imperial symbols. I used one of the normal winged Dark Angels symbols from the Ravenwing Accessory Pack on the front of the engine cover. You need to bend it a little to get it to conform to the engine cover shape. For the biker you will probably need to use a little greenstuff to fill in the area between the two leg pieces. I like to keep the torso separate until I have painted it. If I’m not going to get to painting it right away I’ll use a paperclip to pin it onto the legs without gluing them all together so it stays on the model.
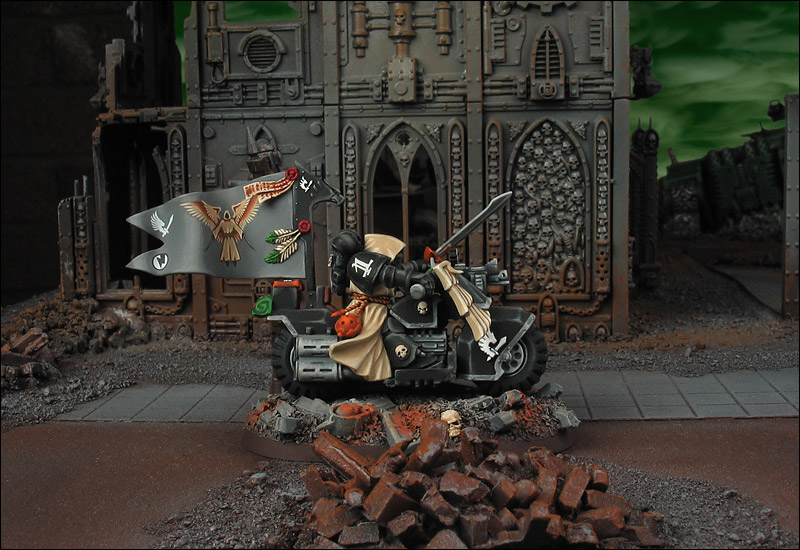
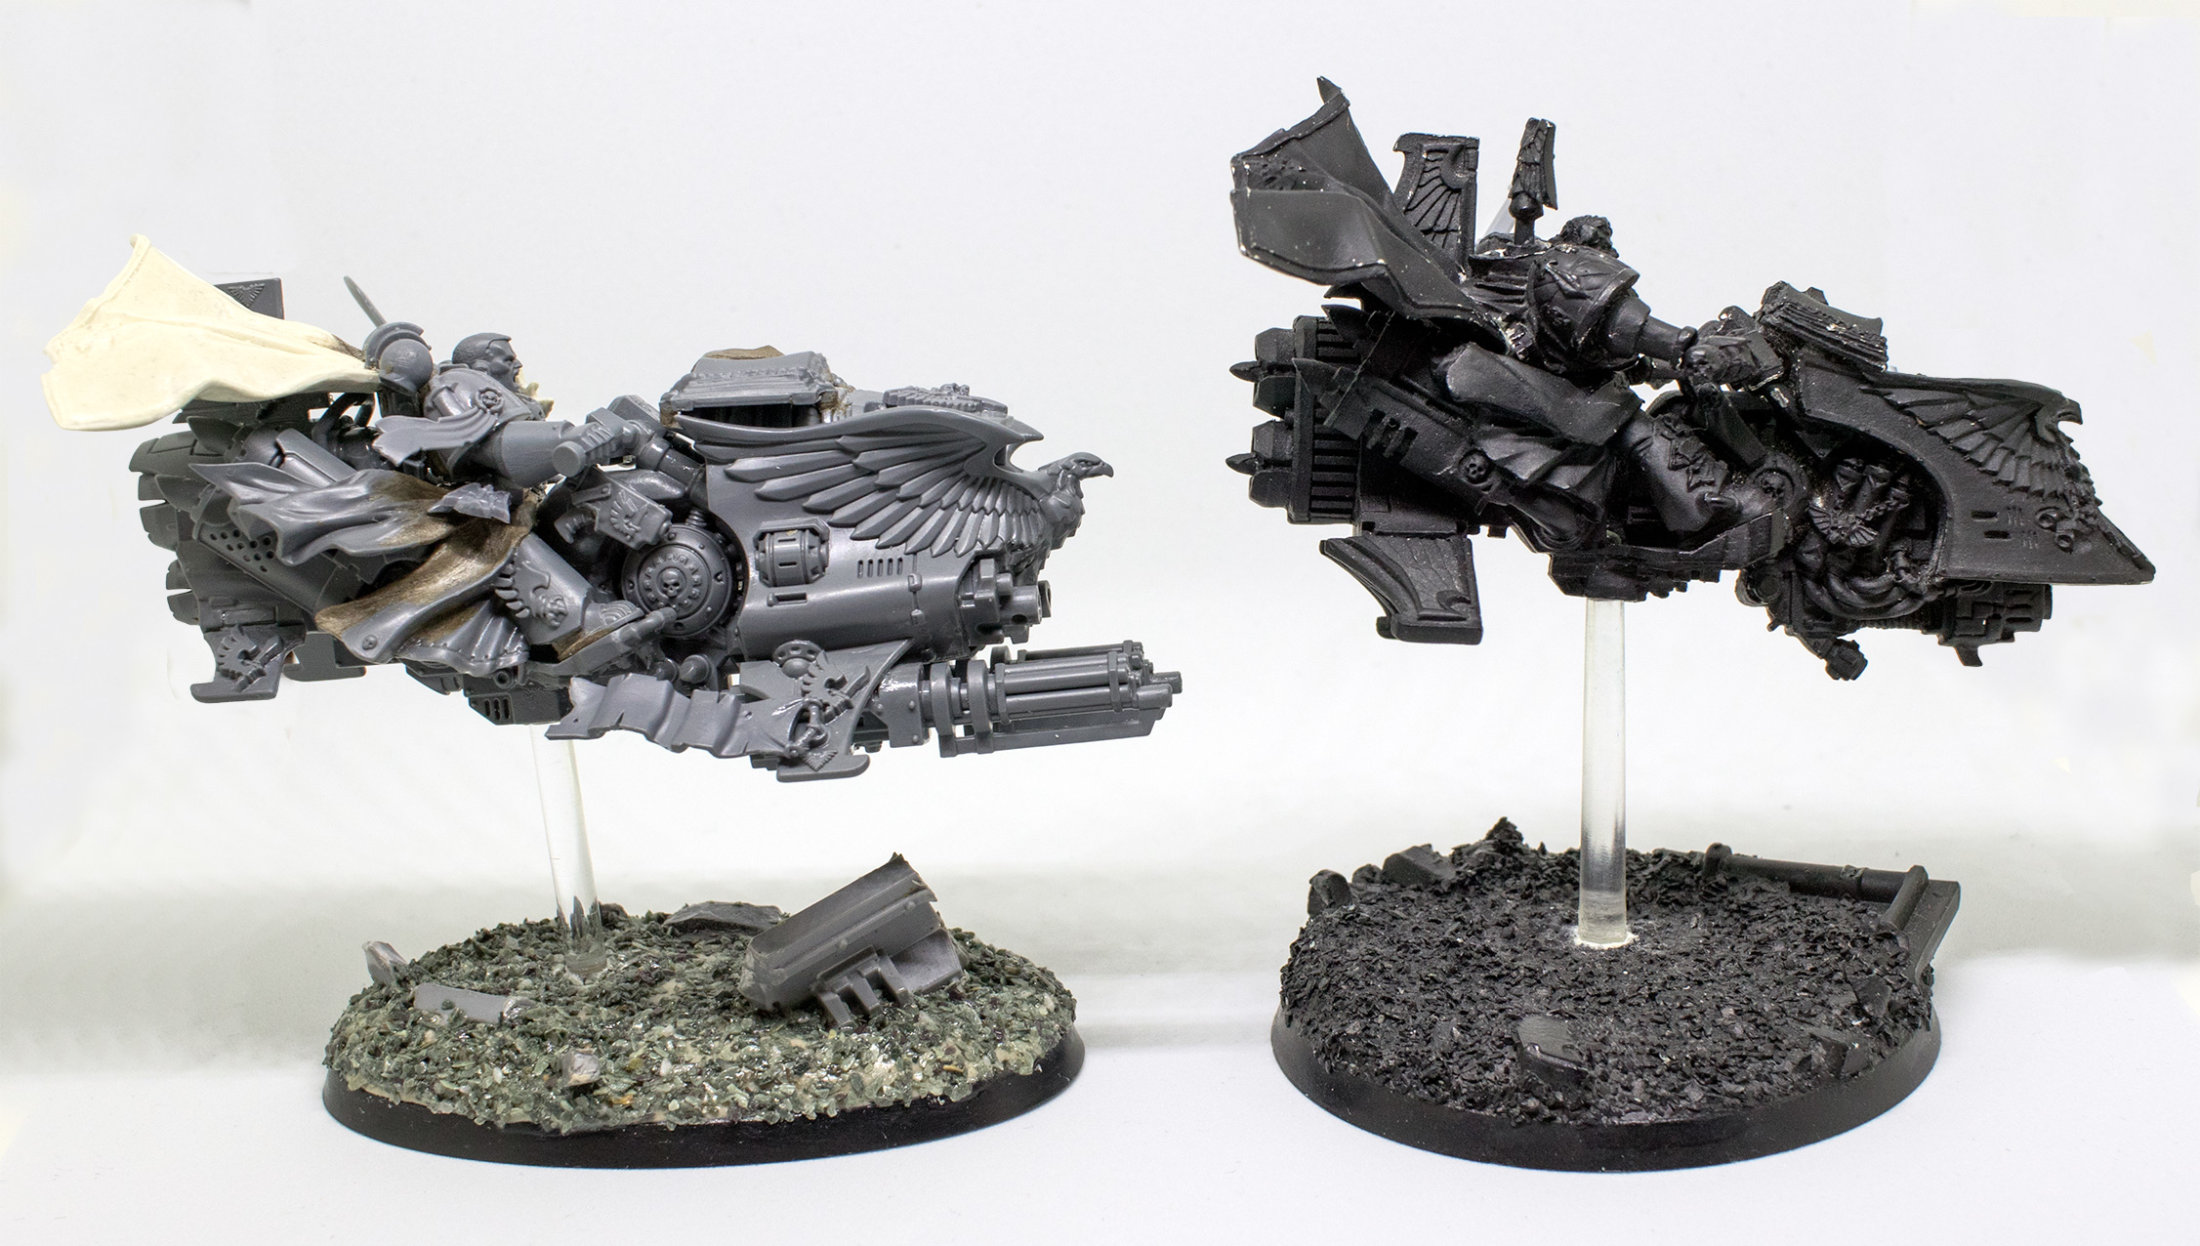
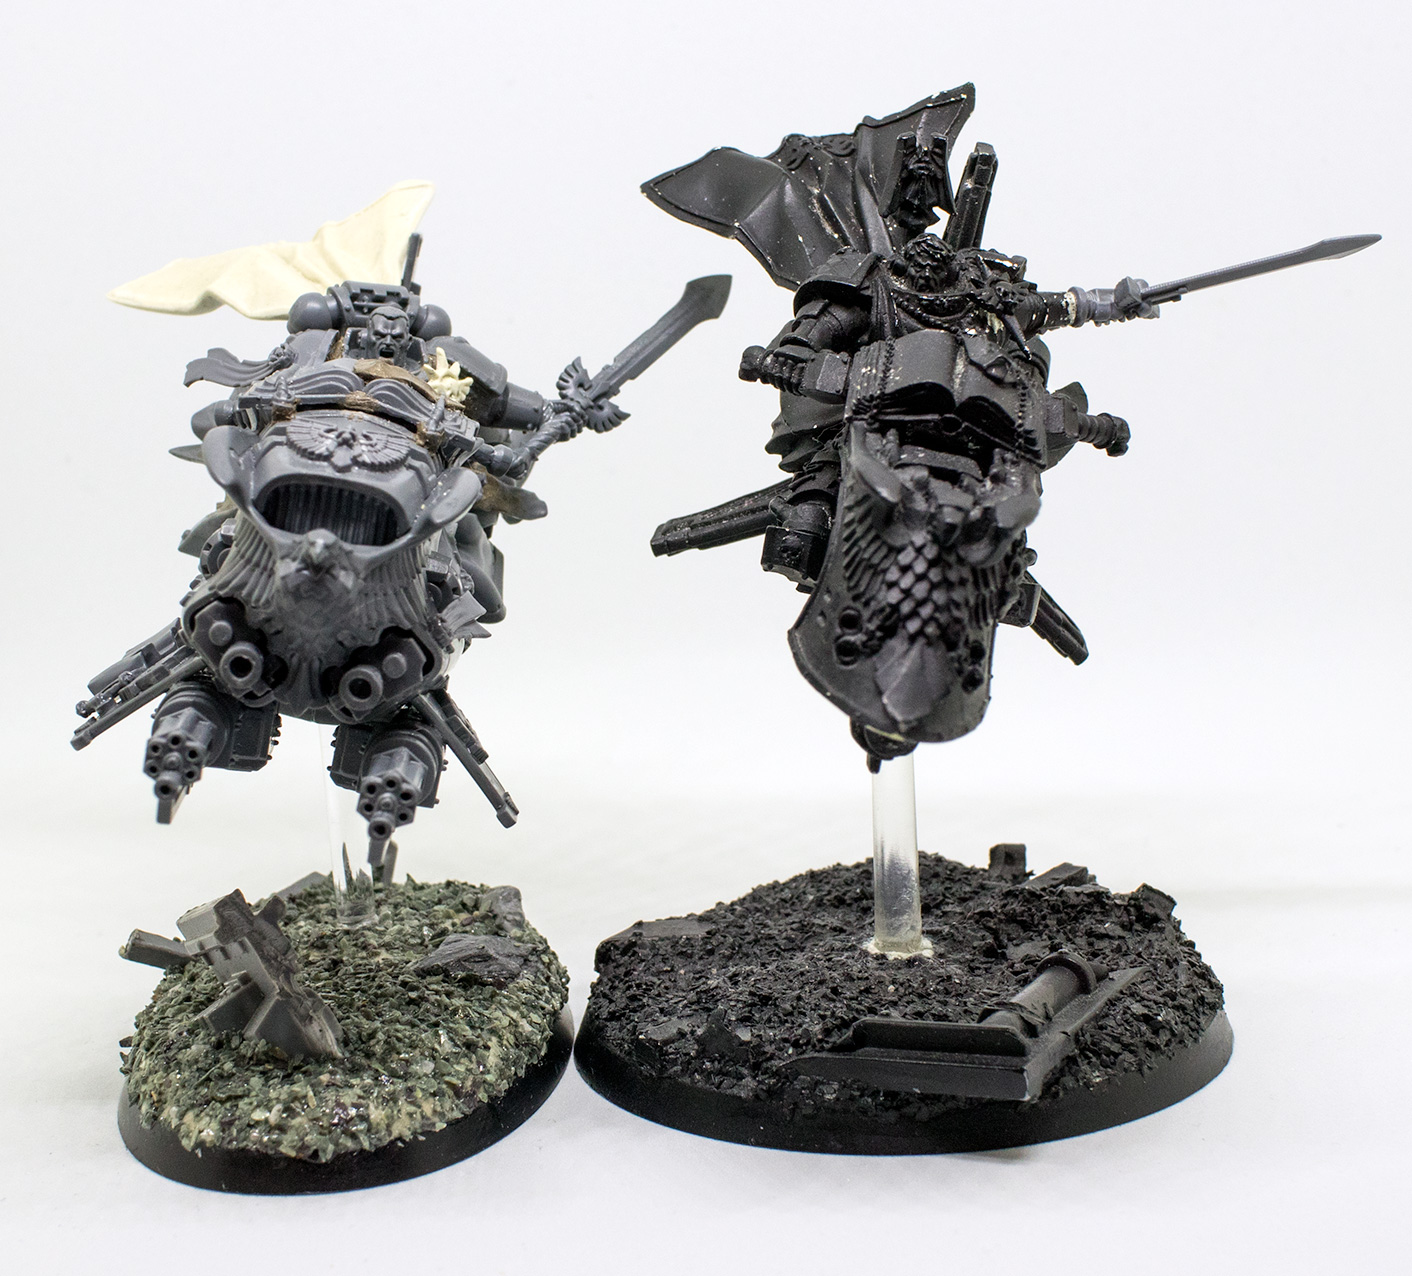
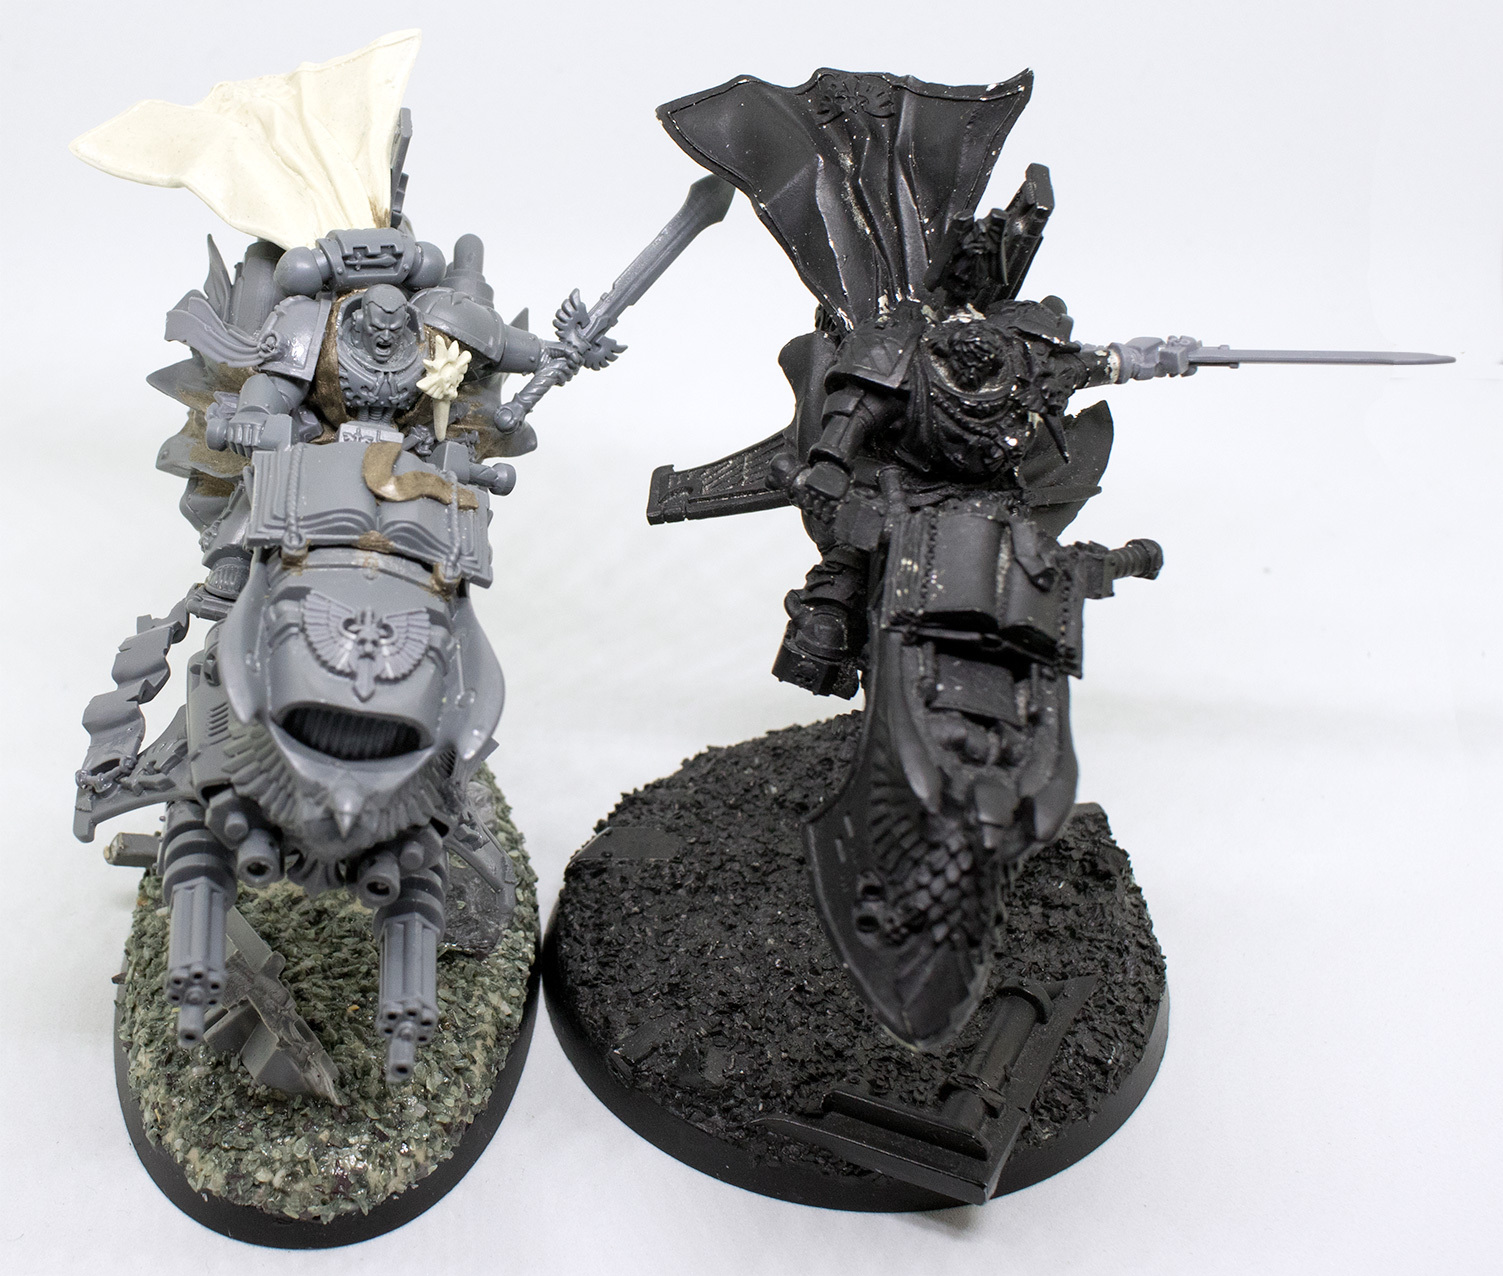
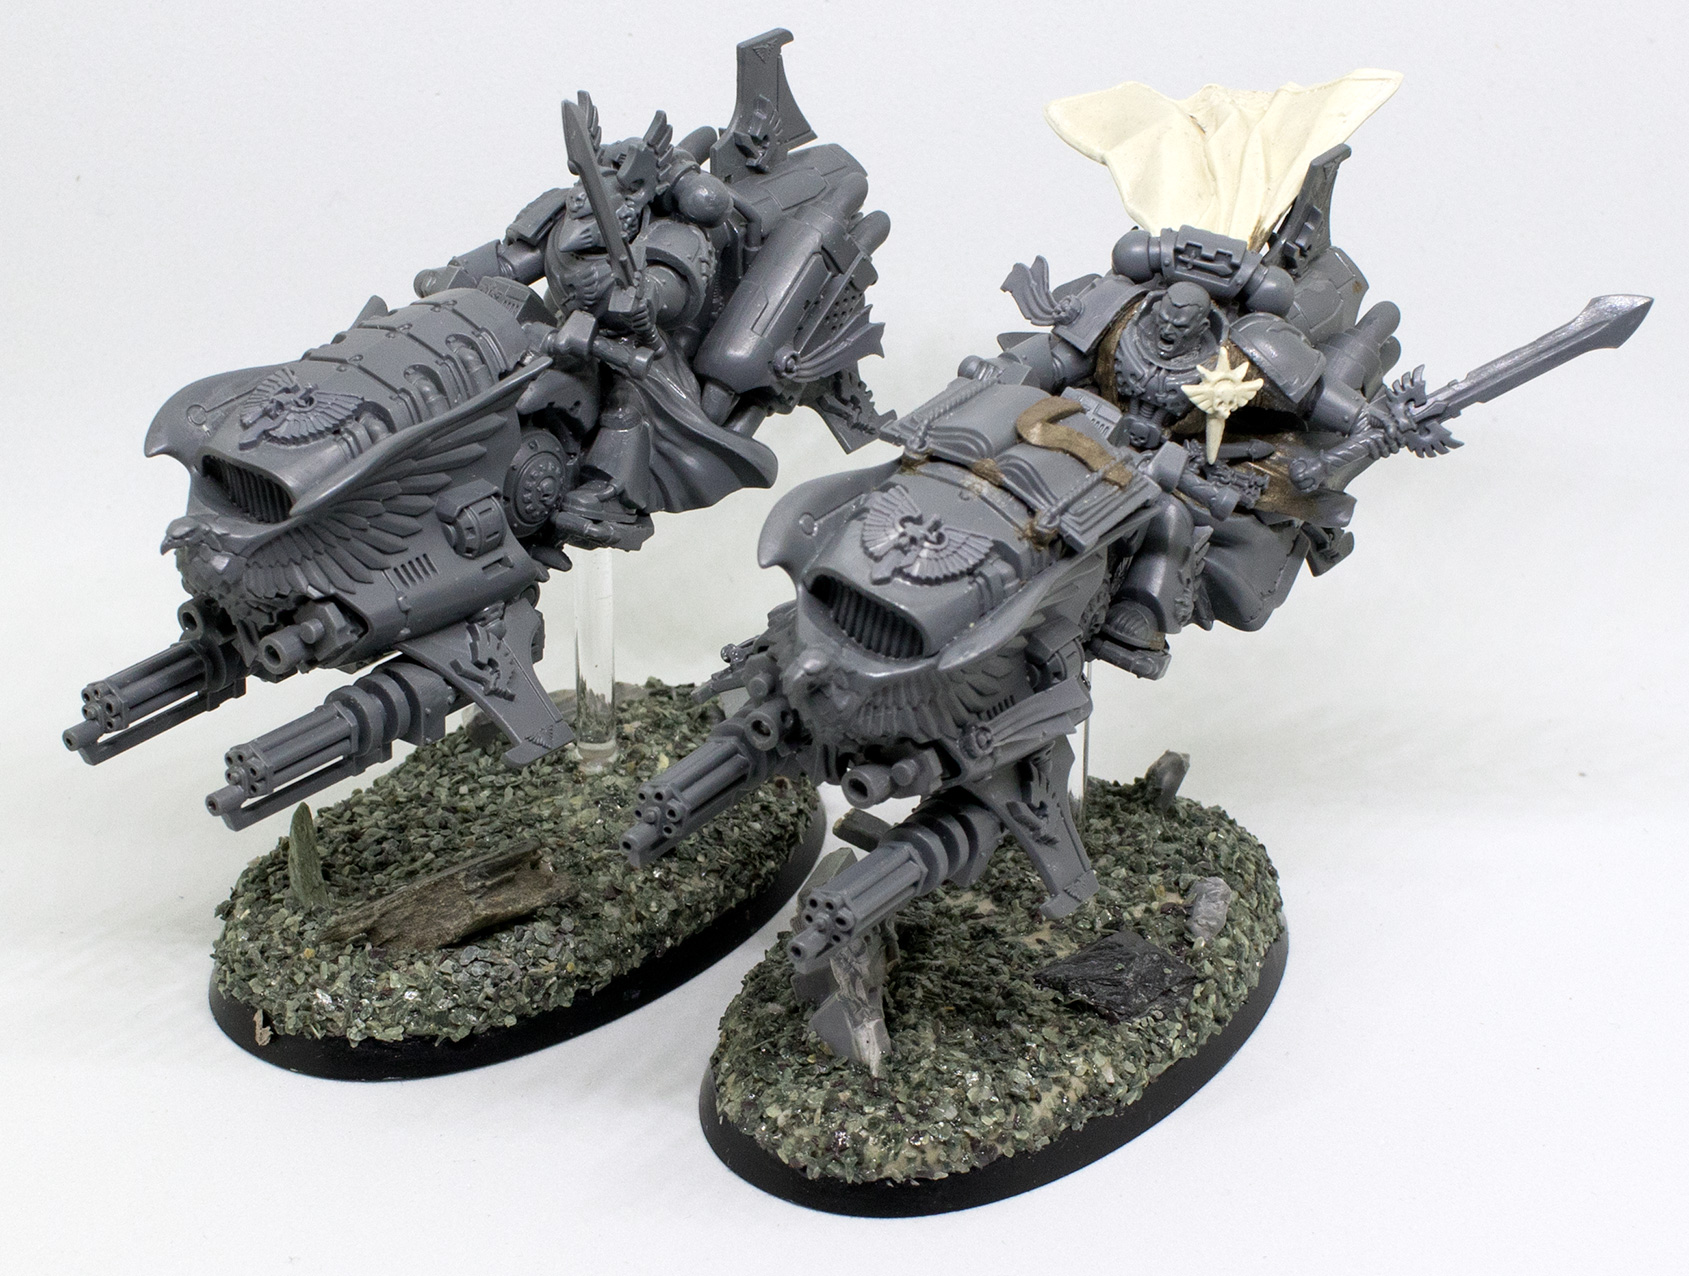
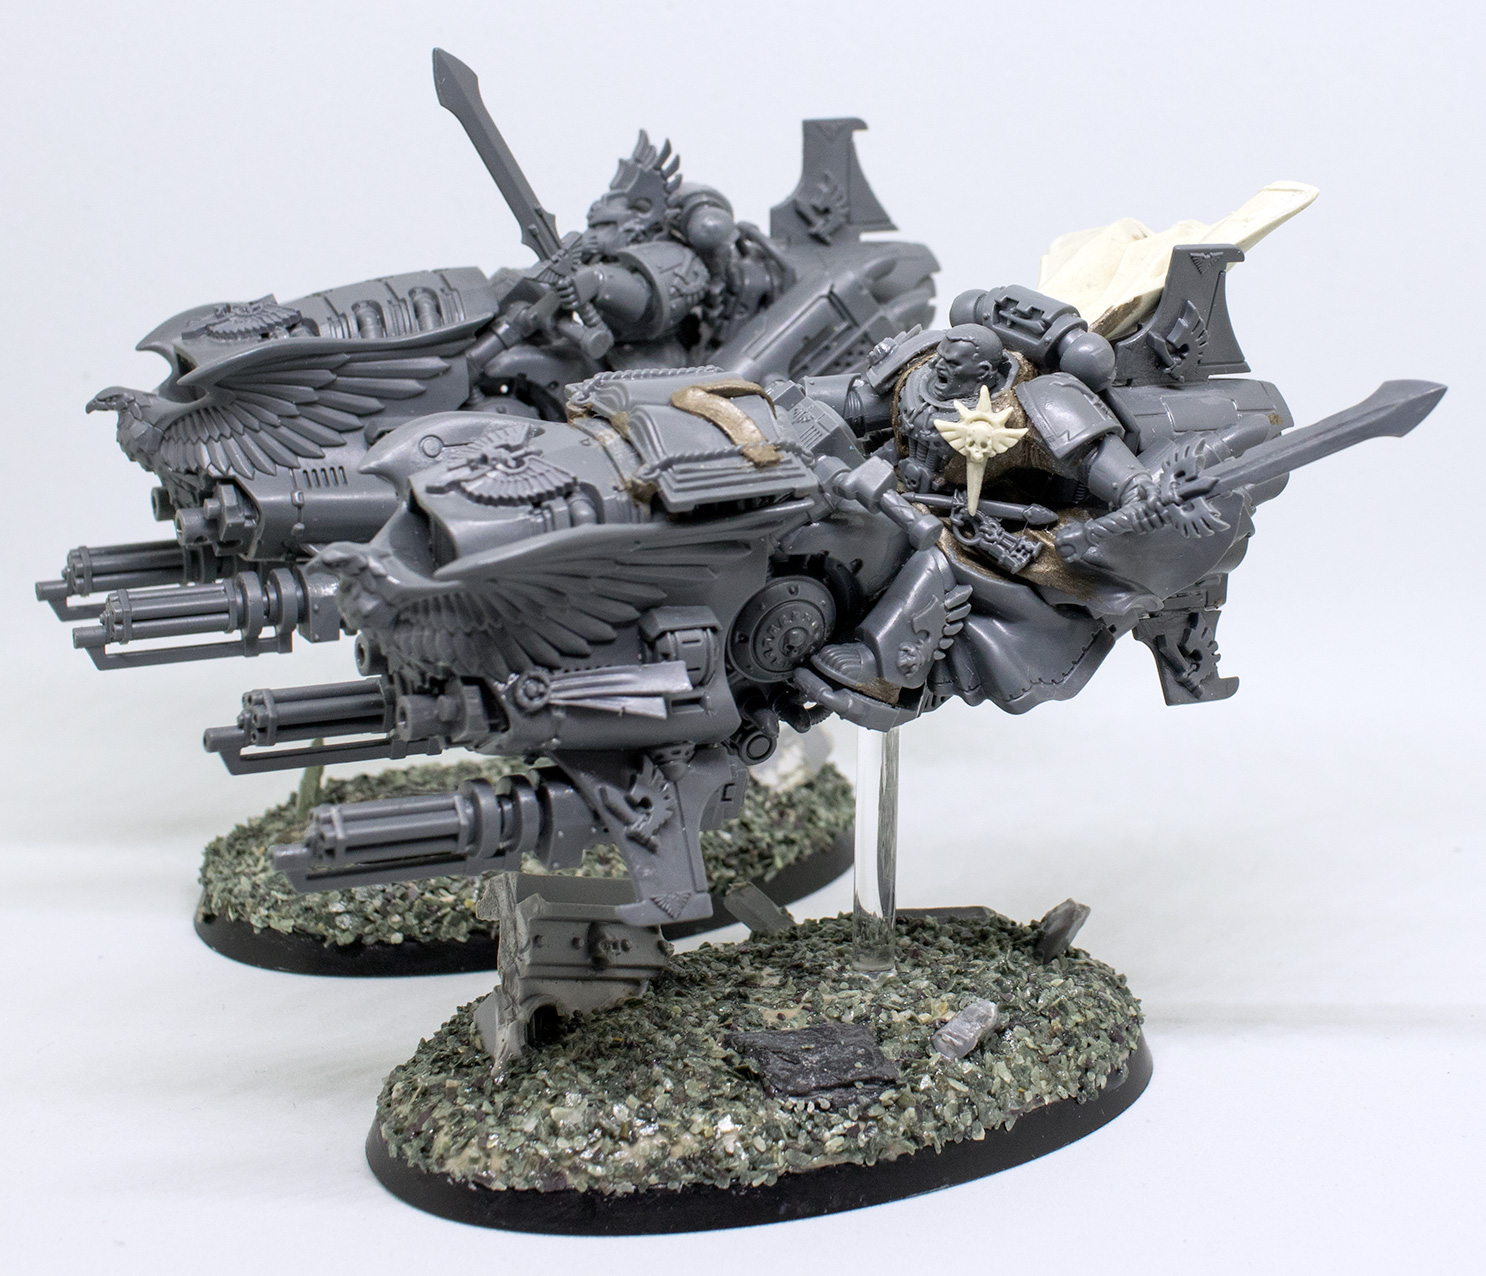
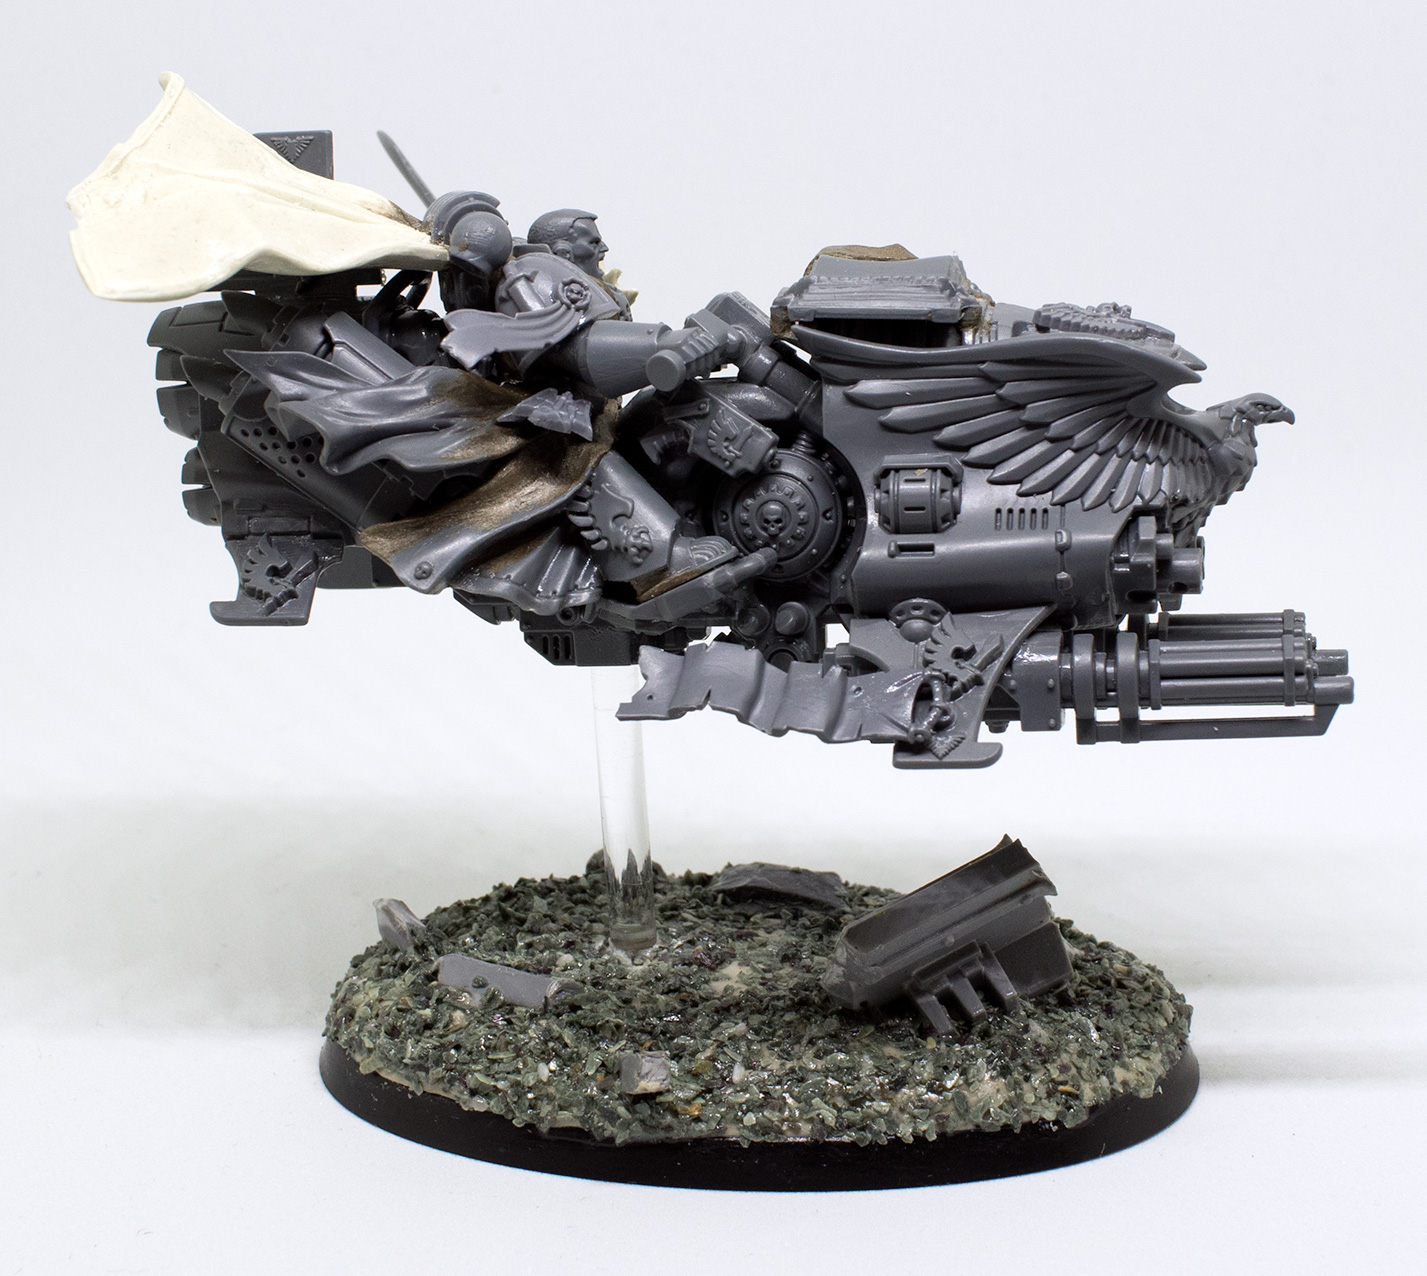
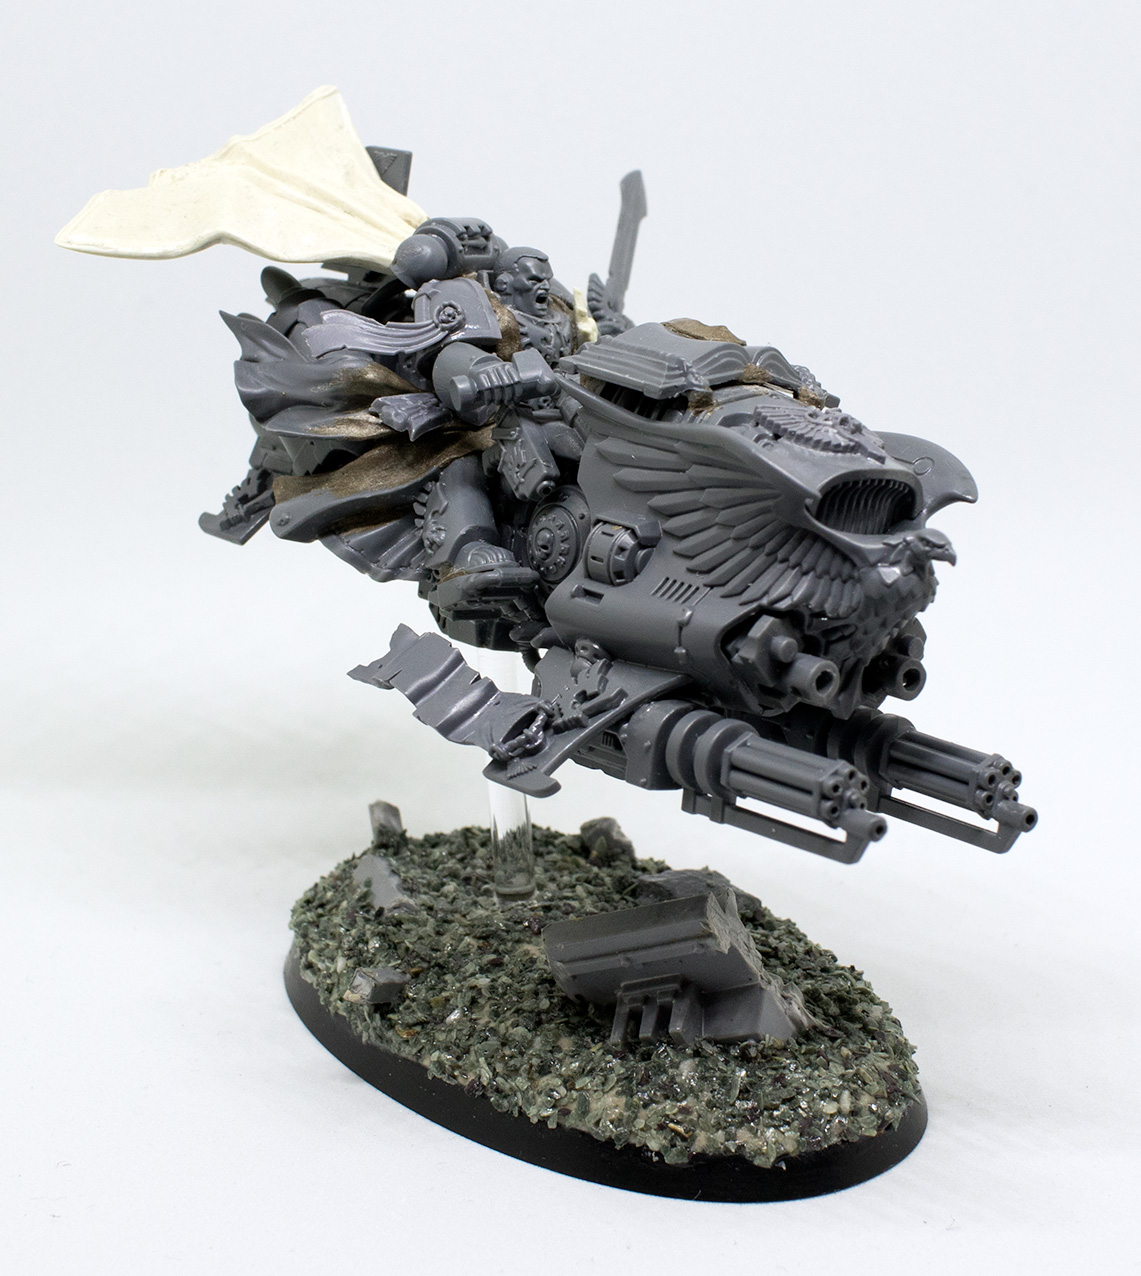
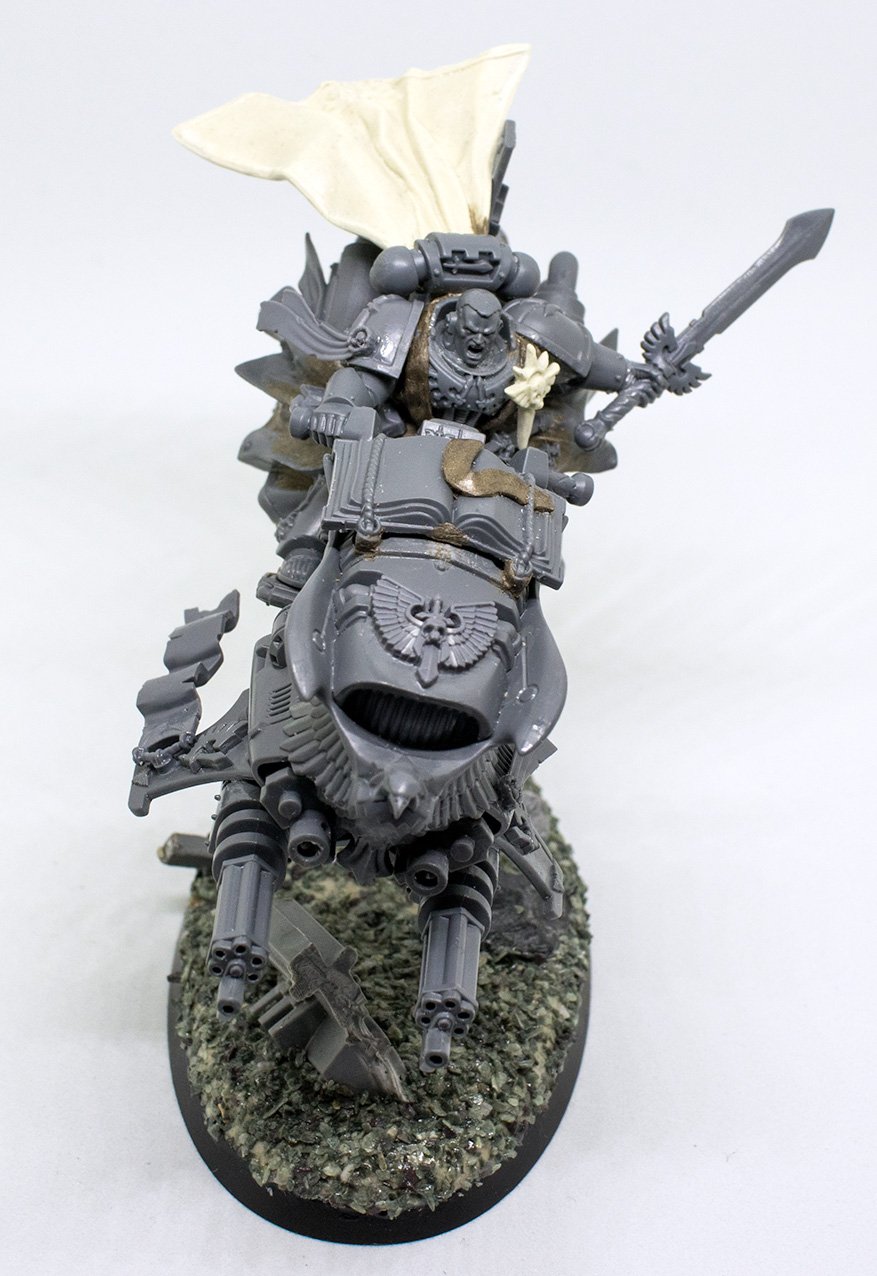
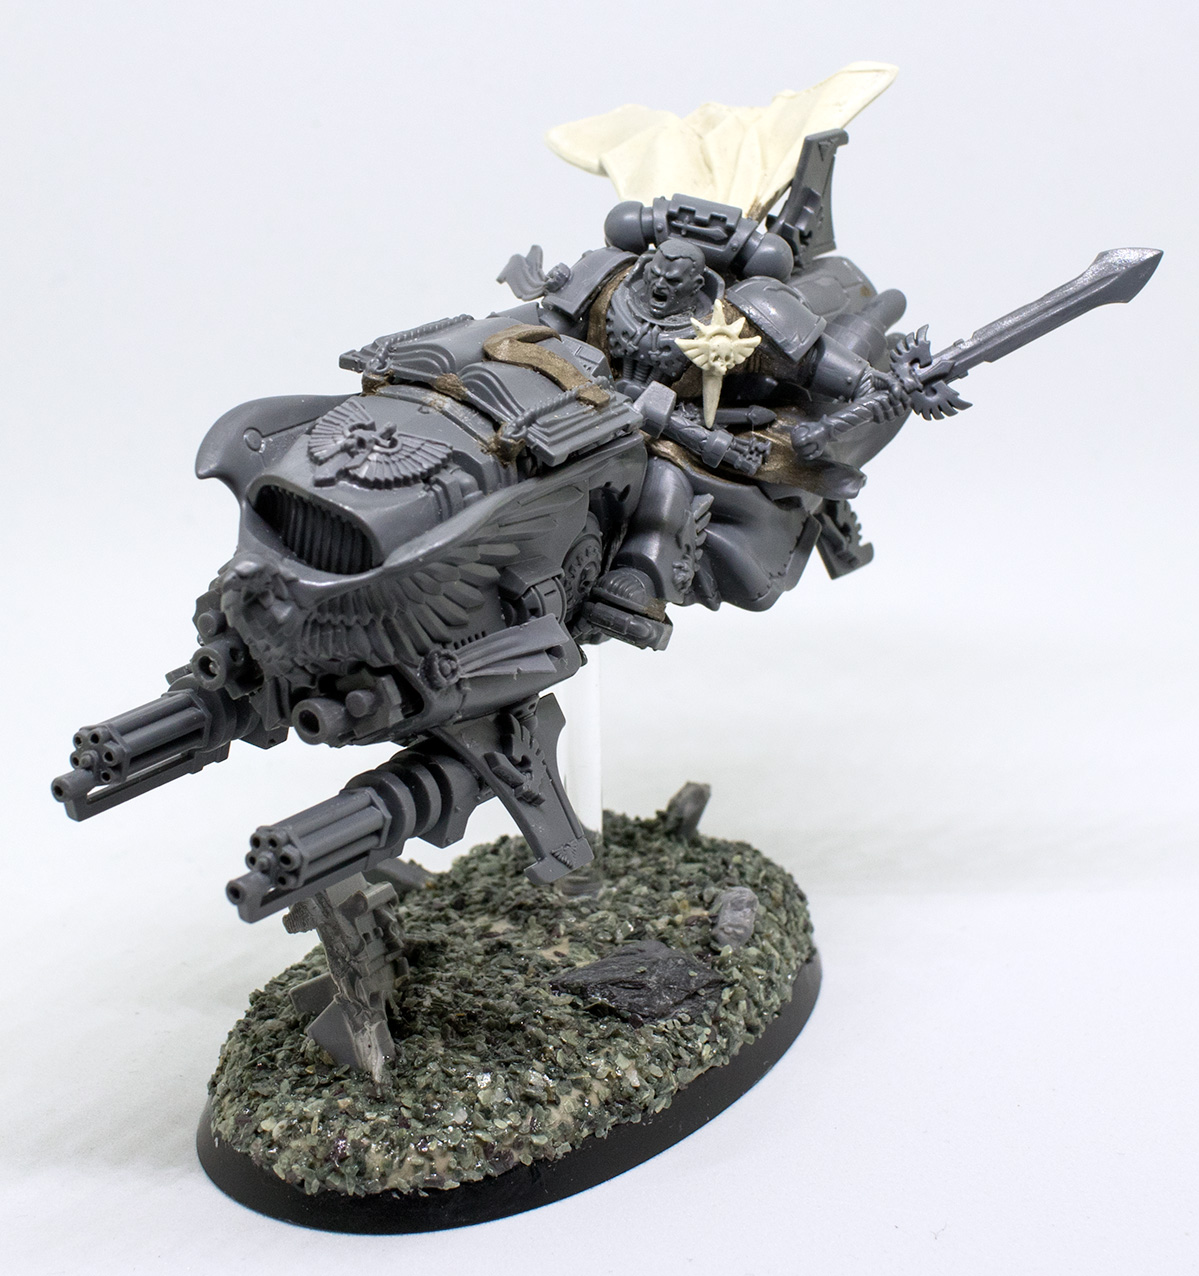
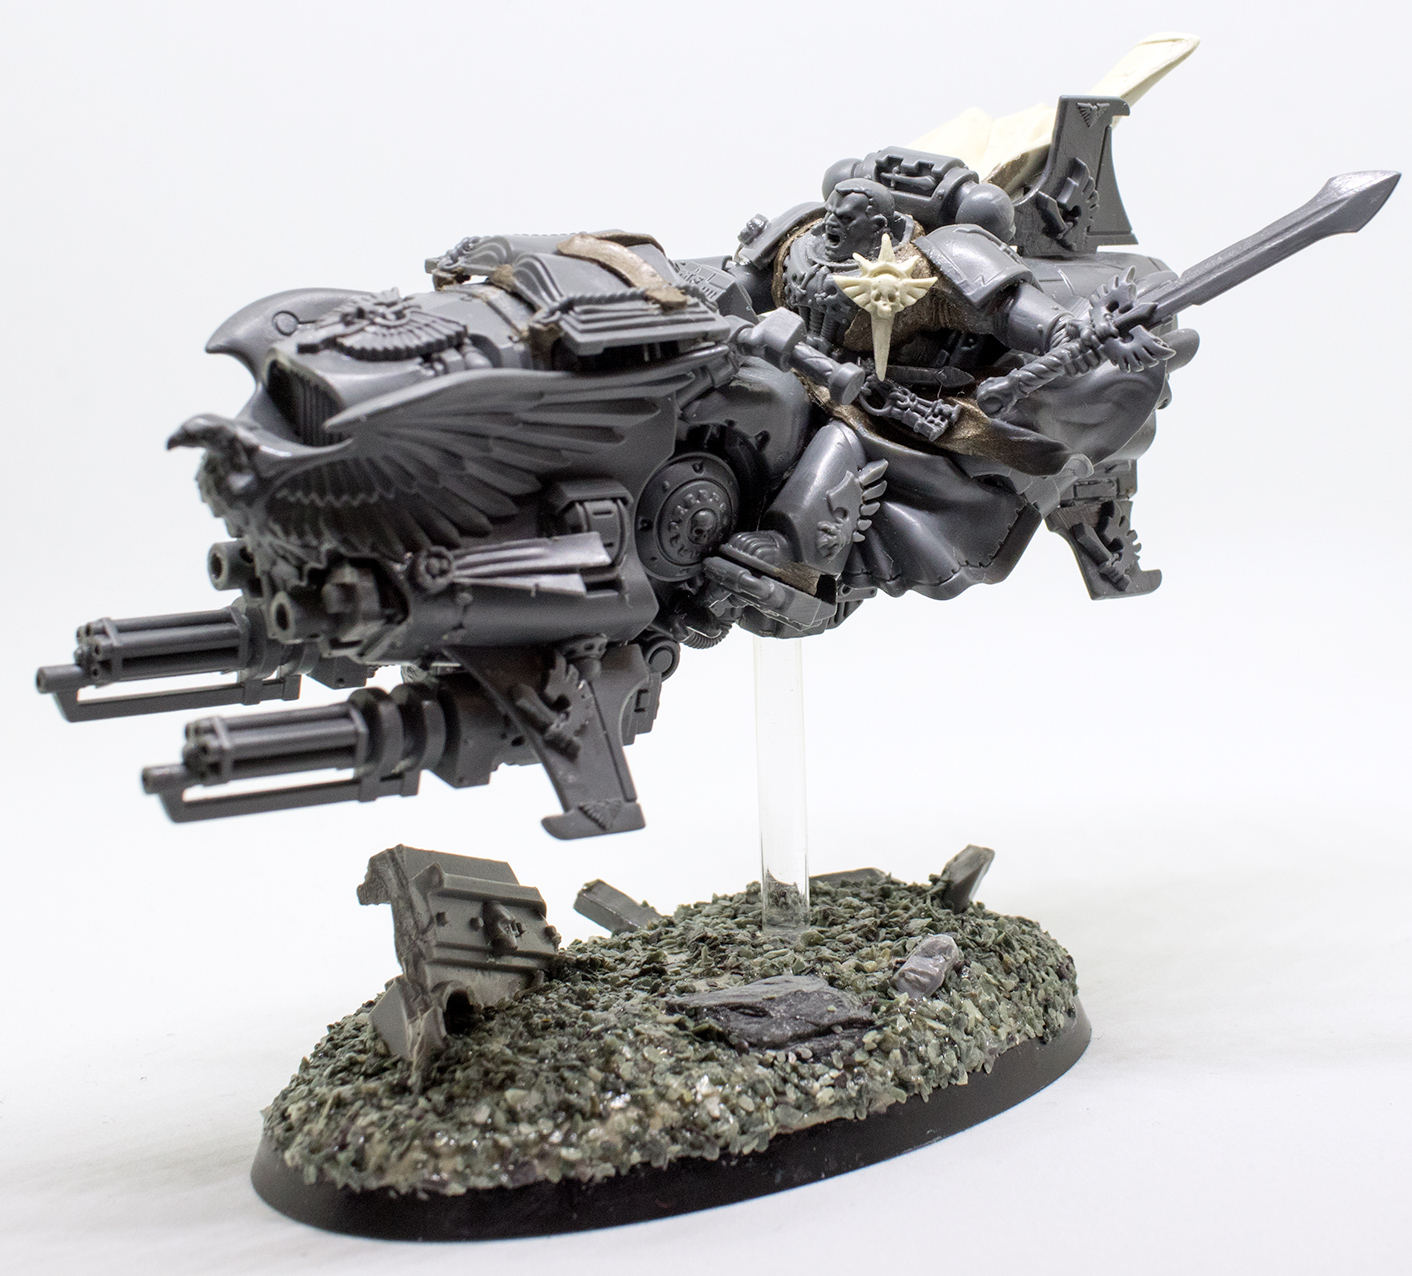
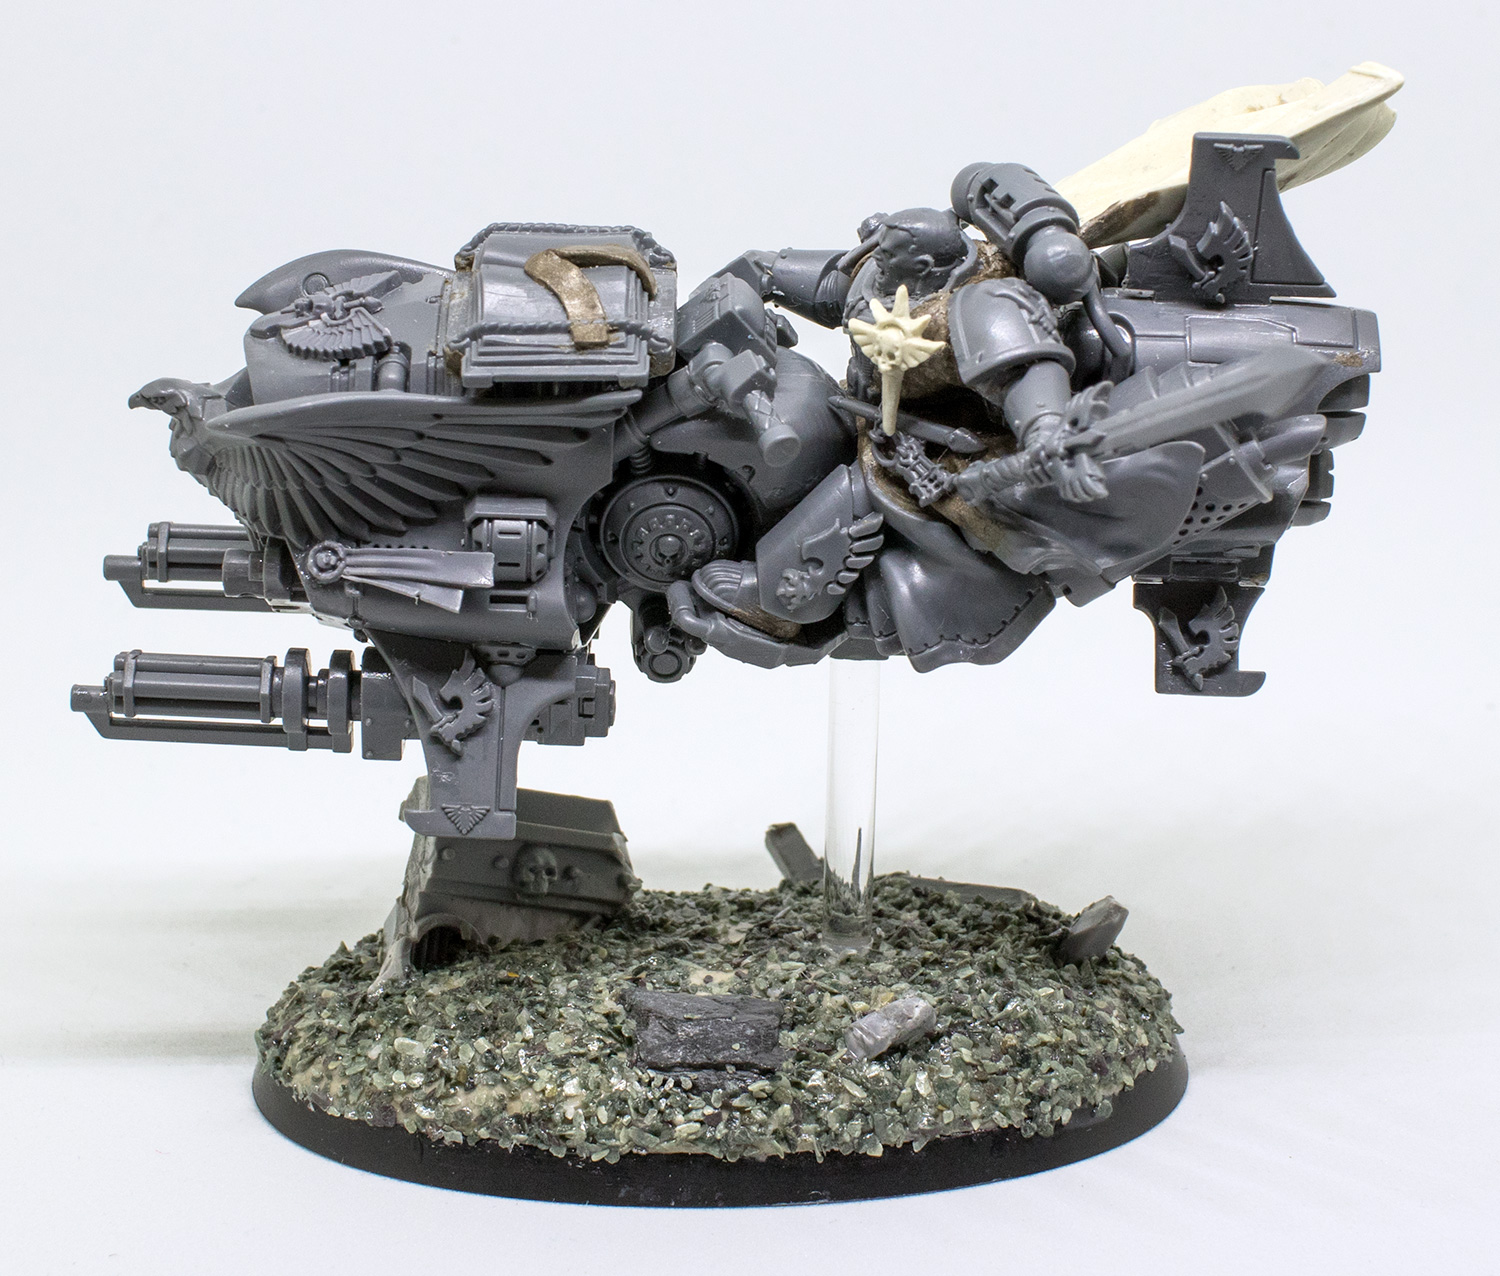
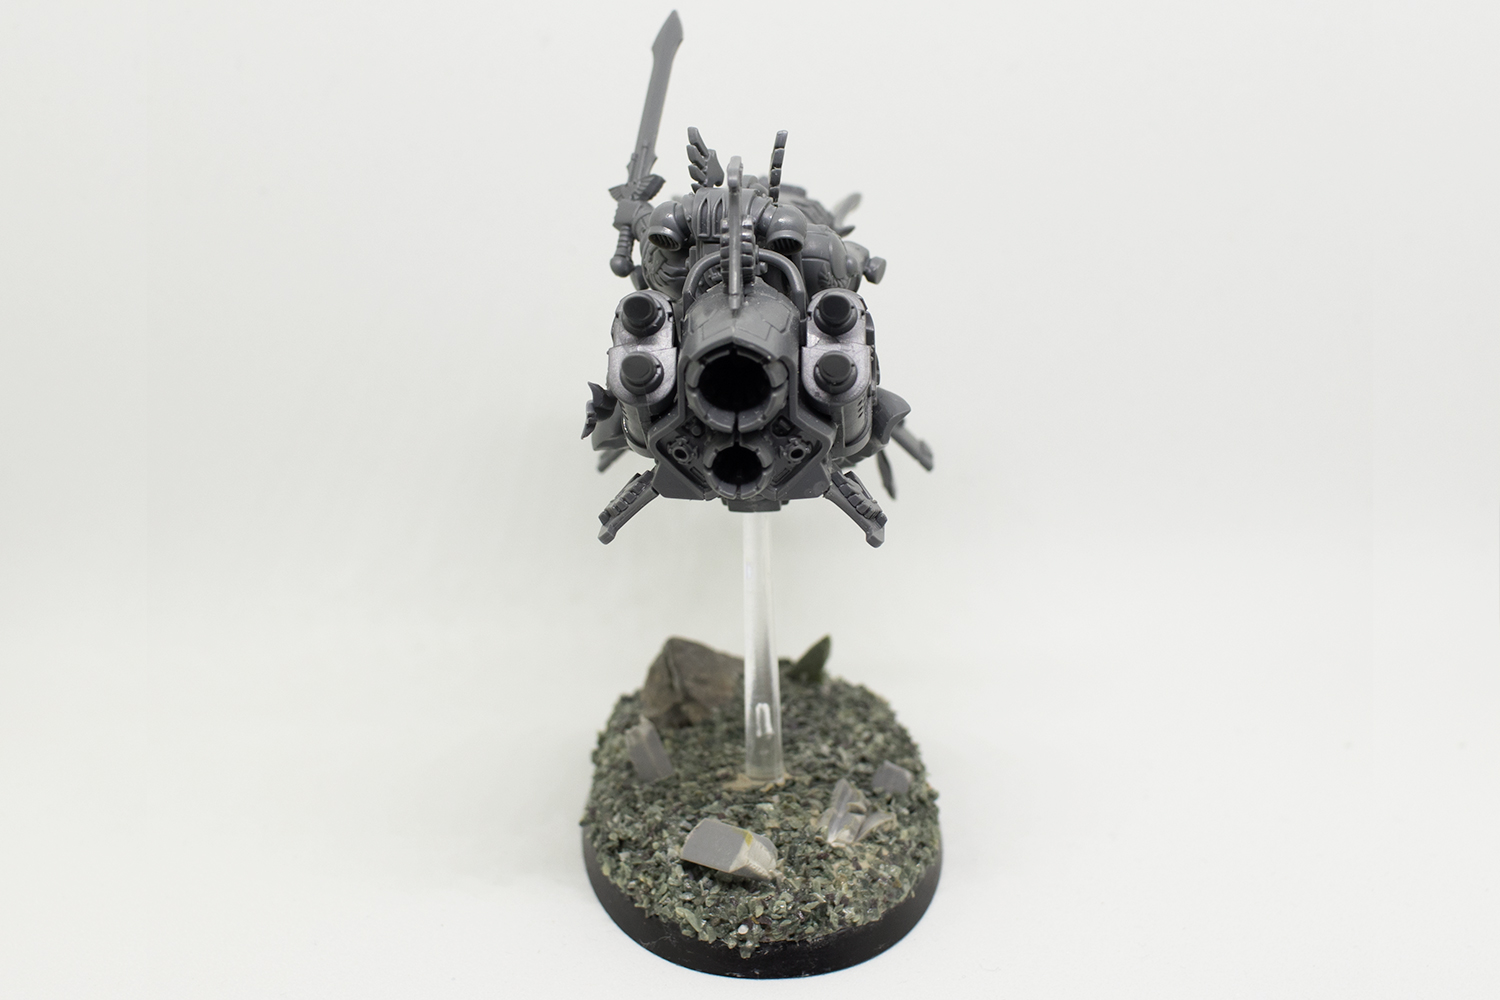
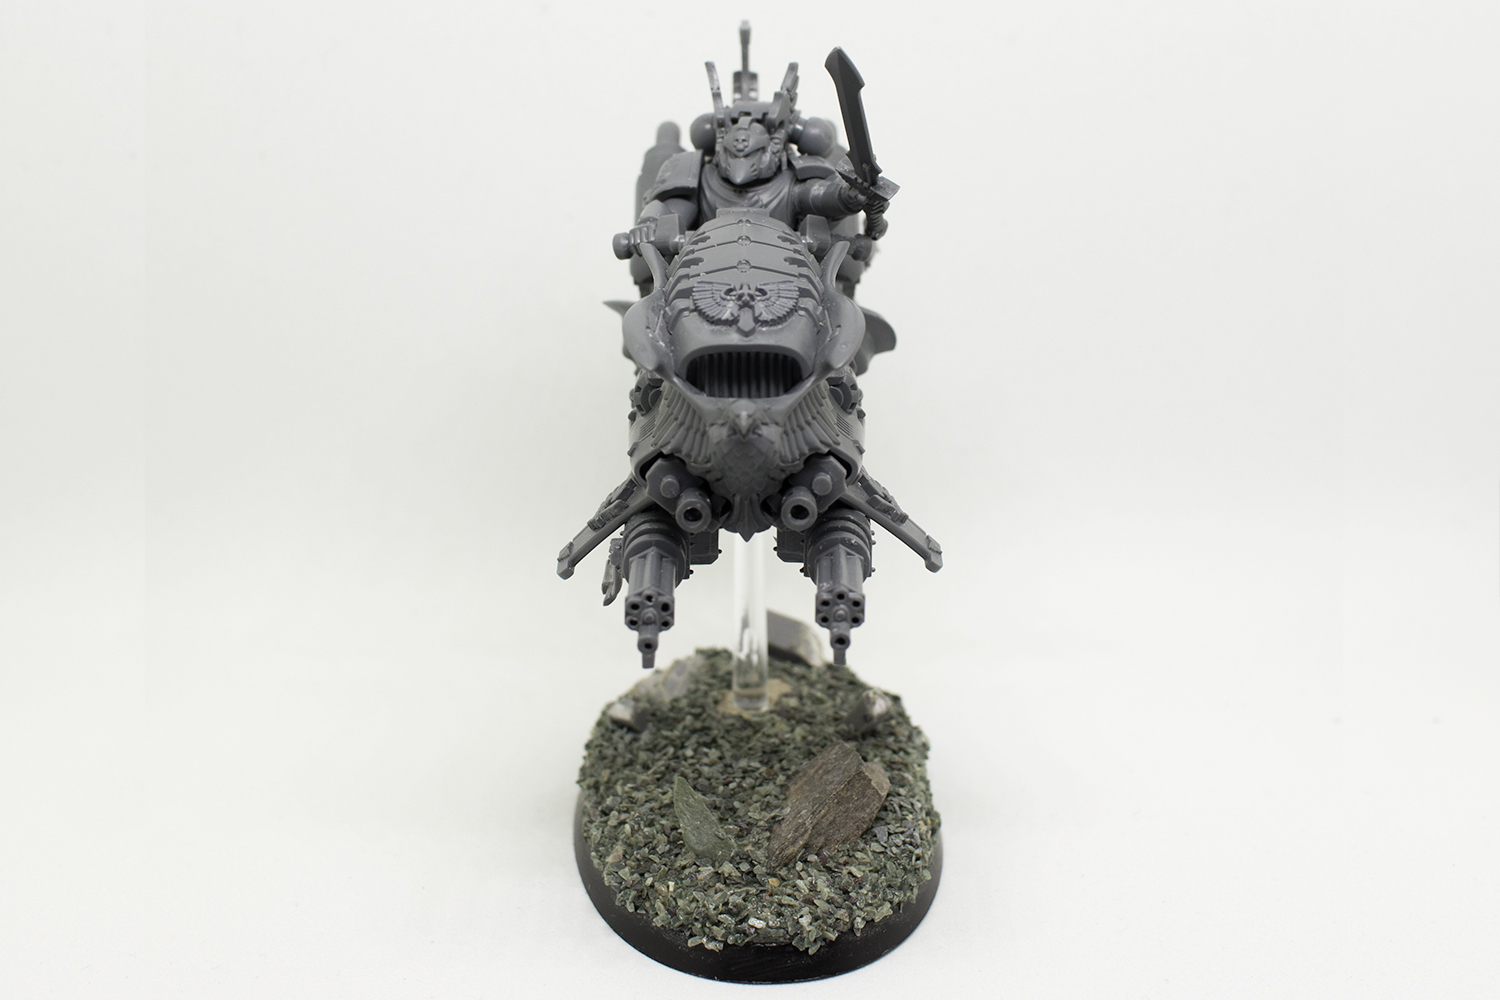
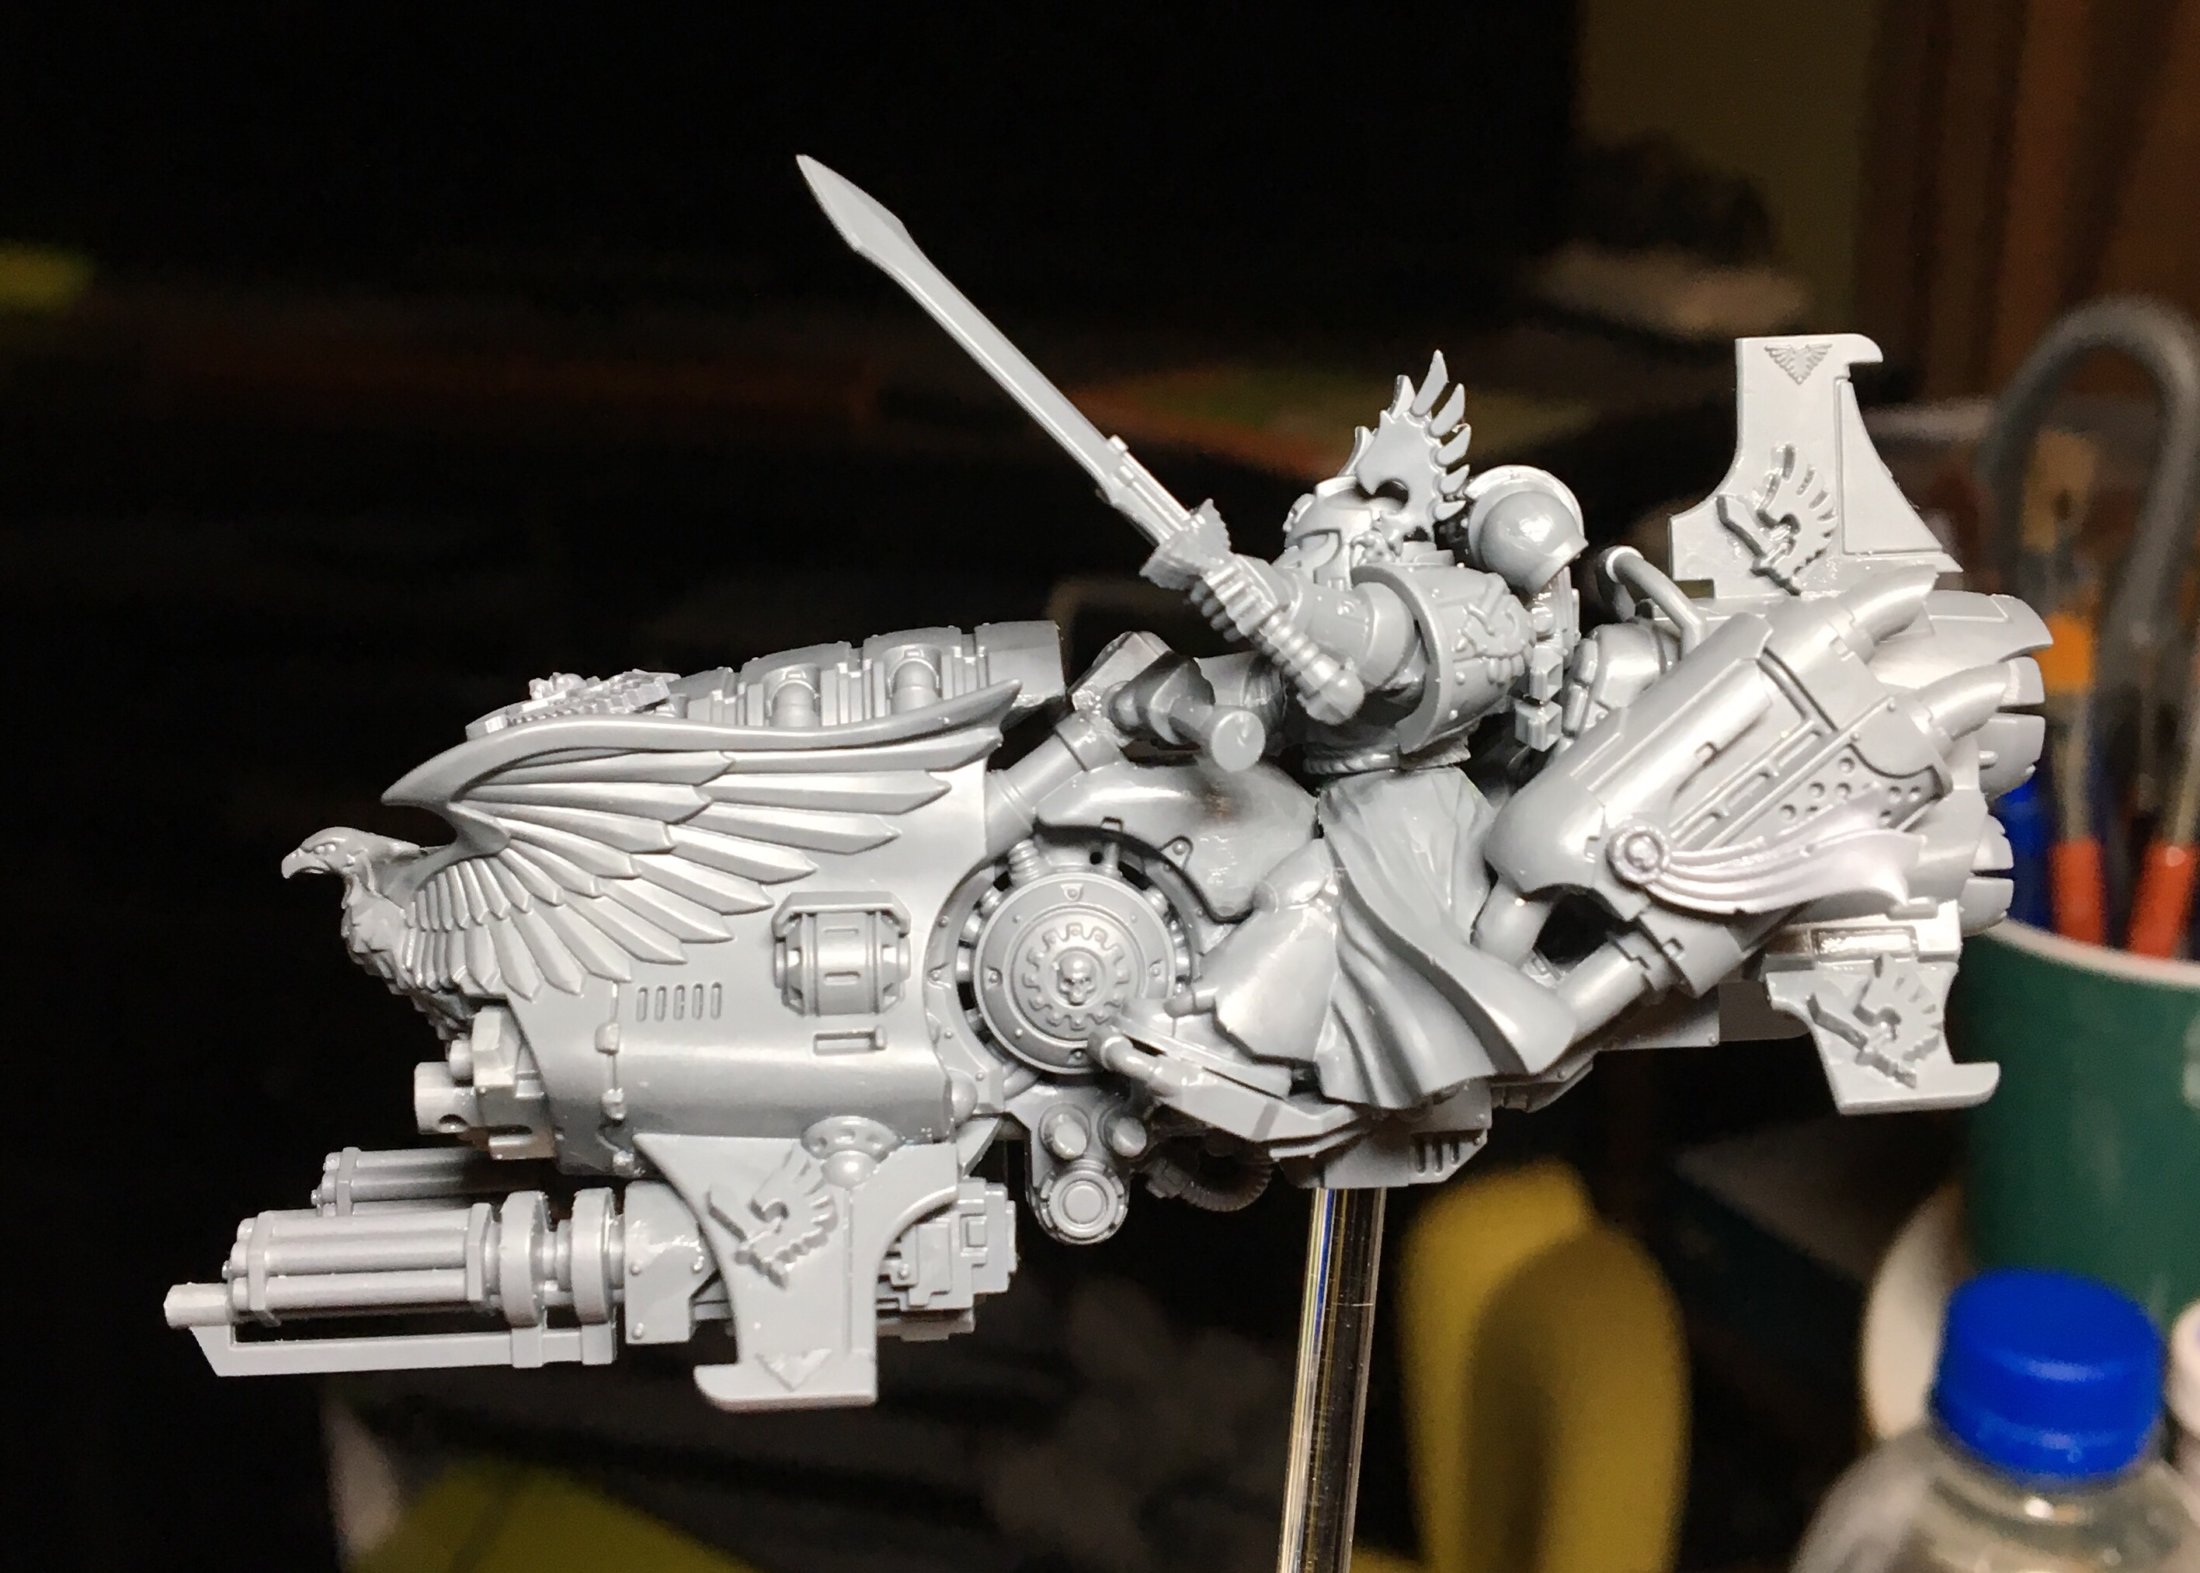
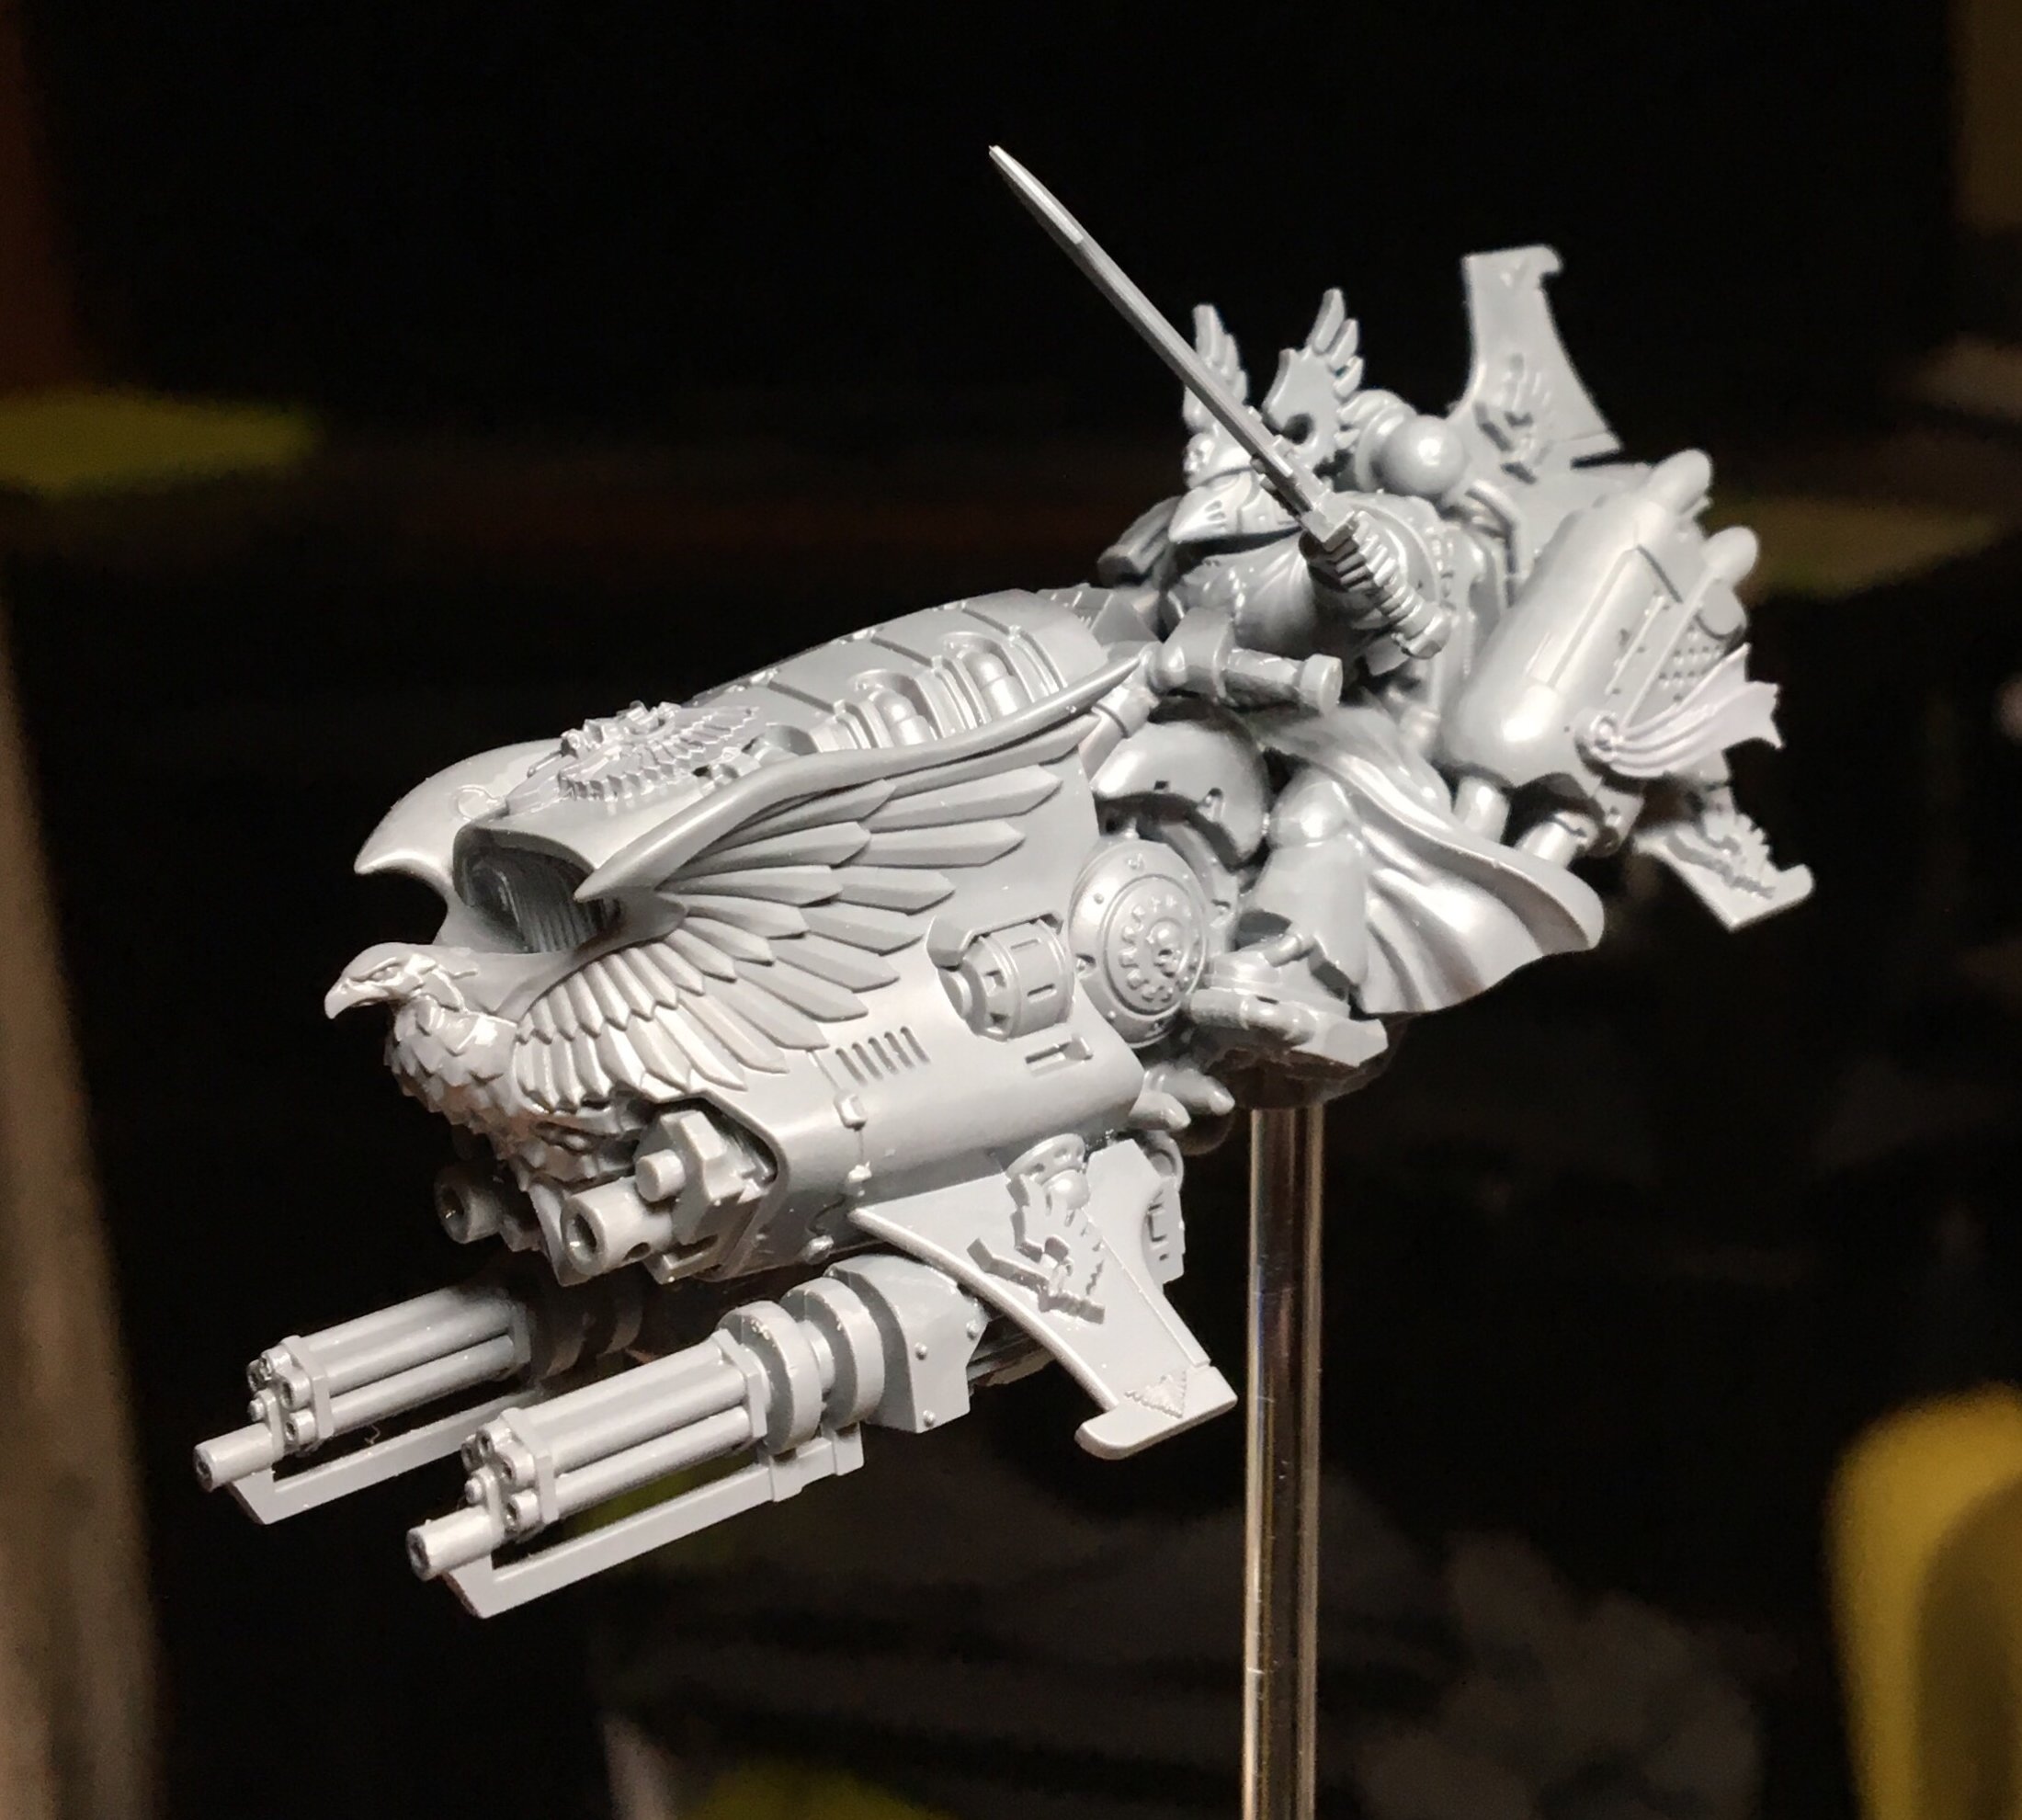
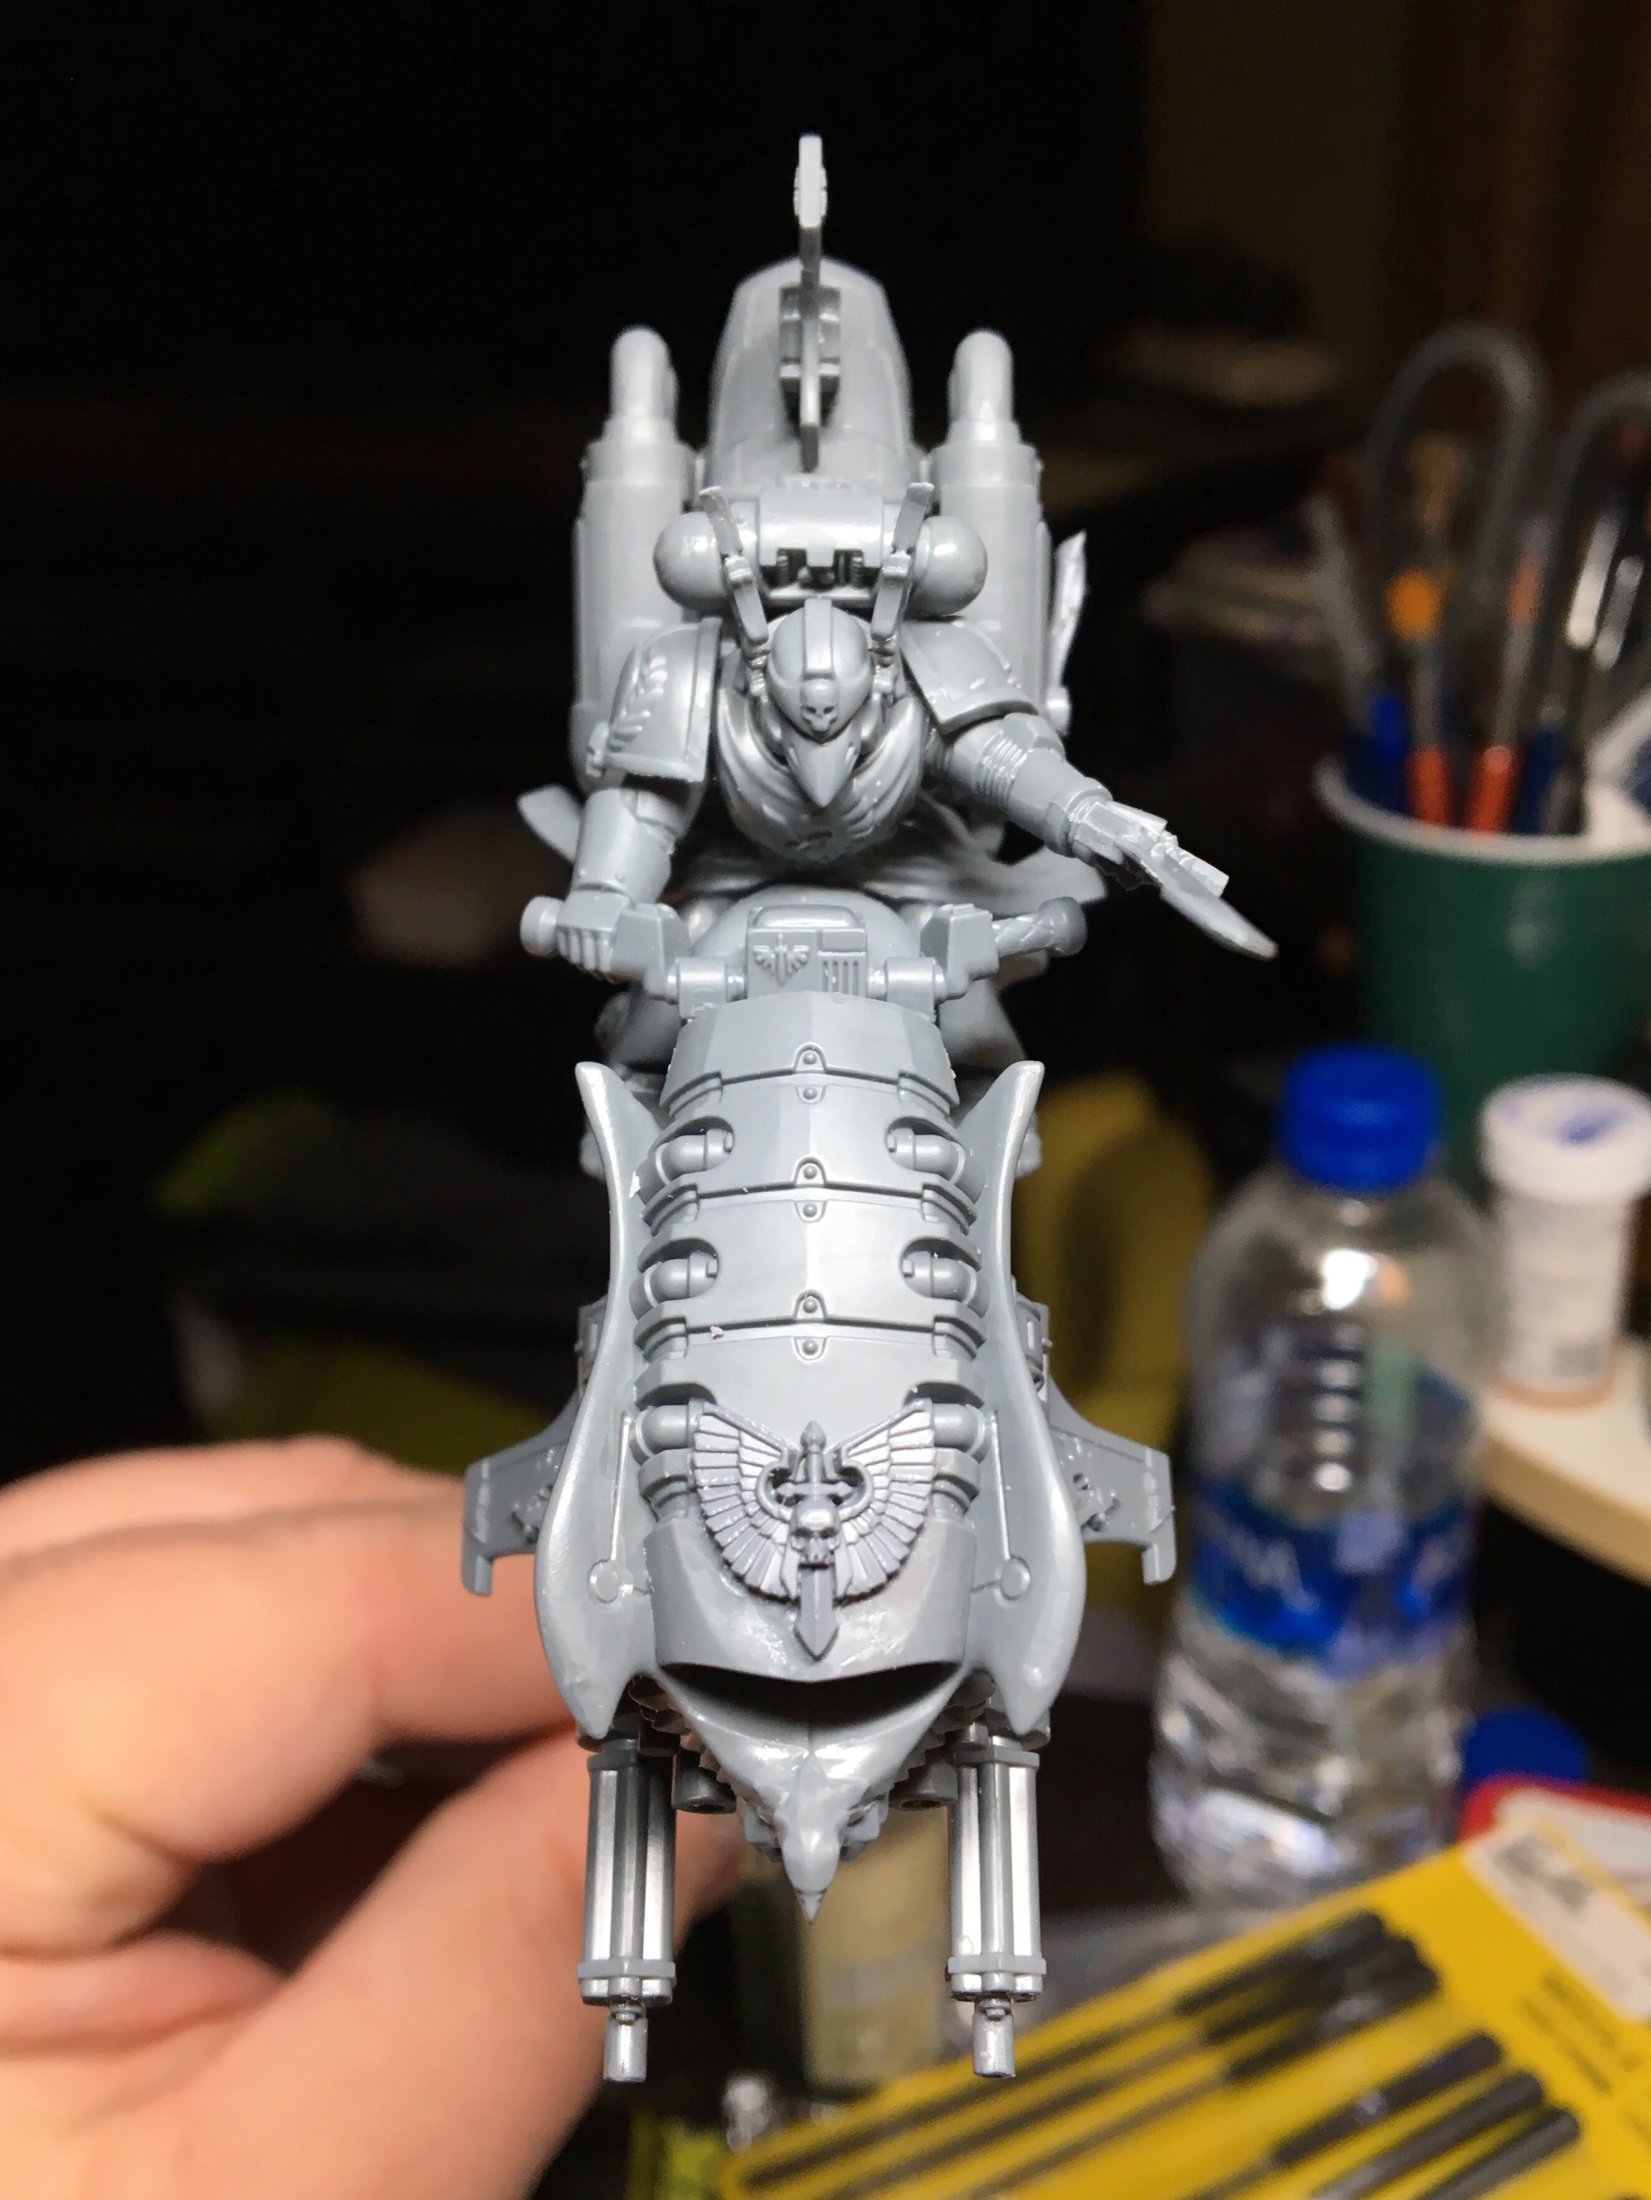
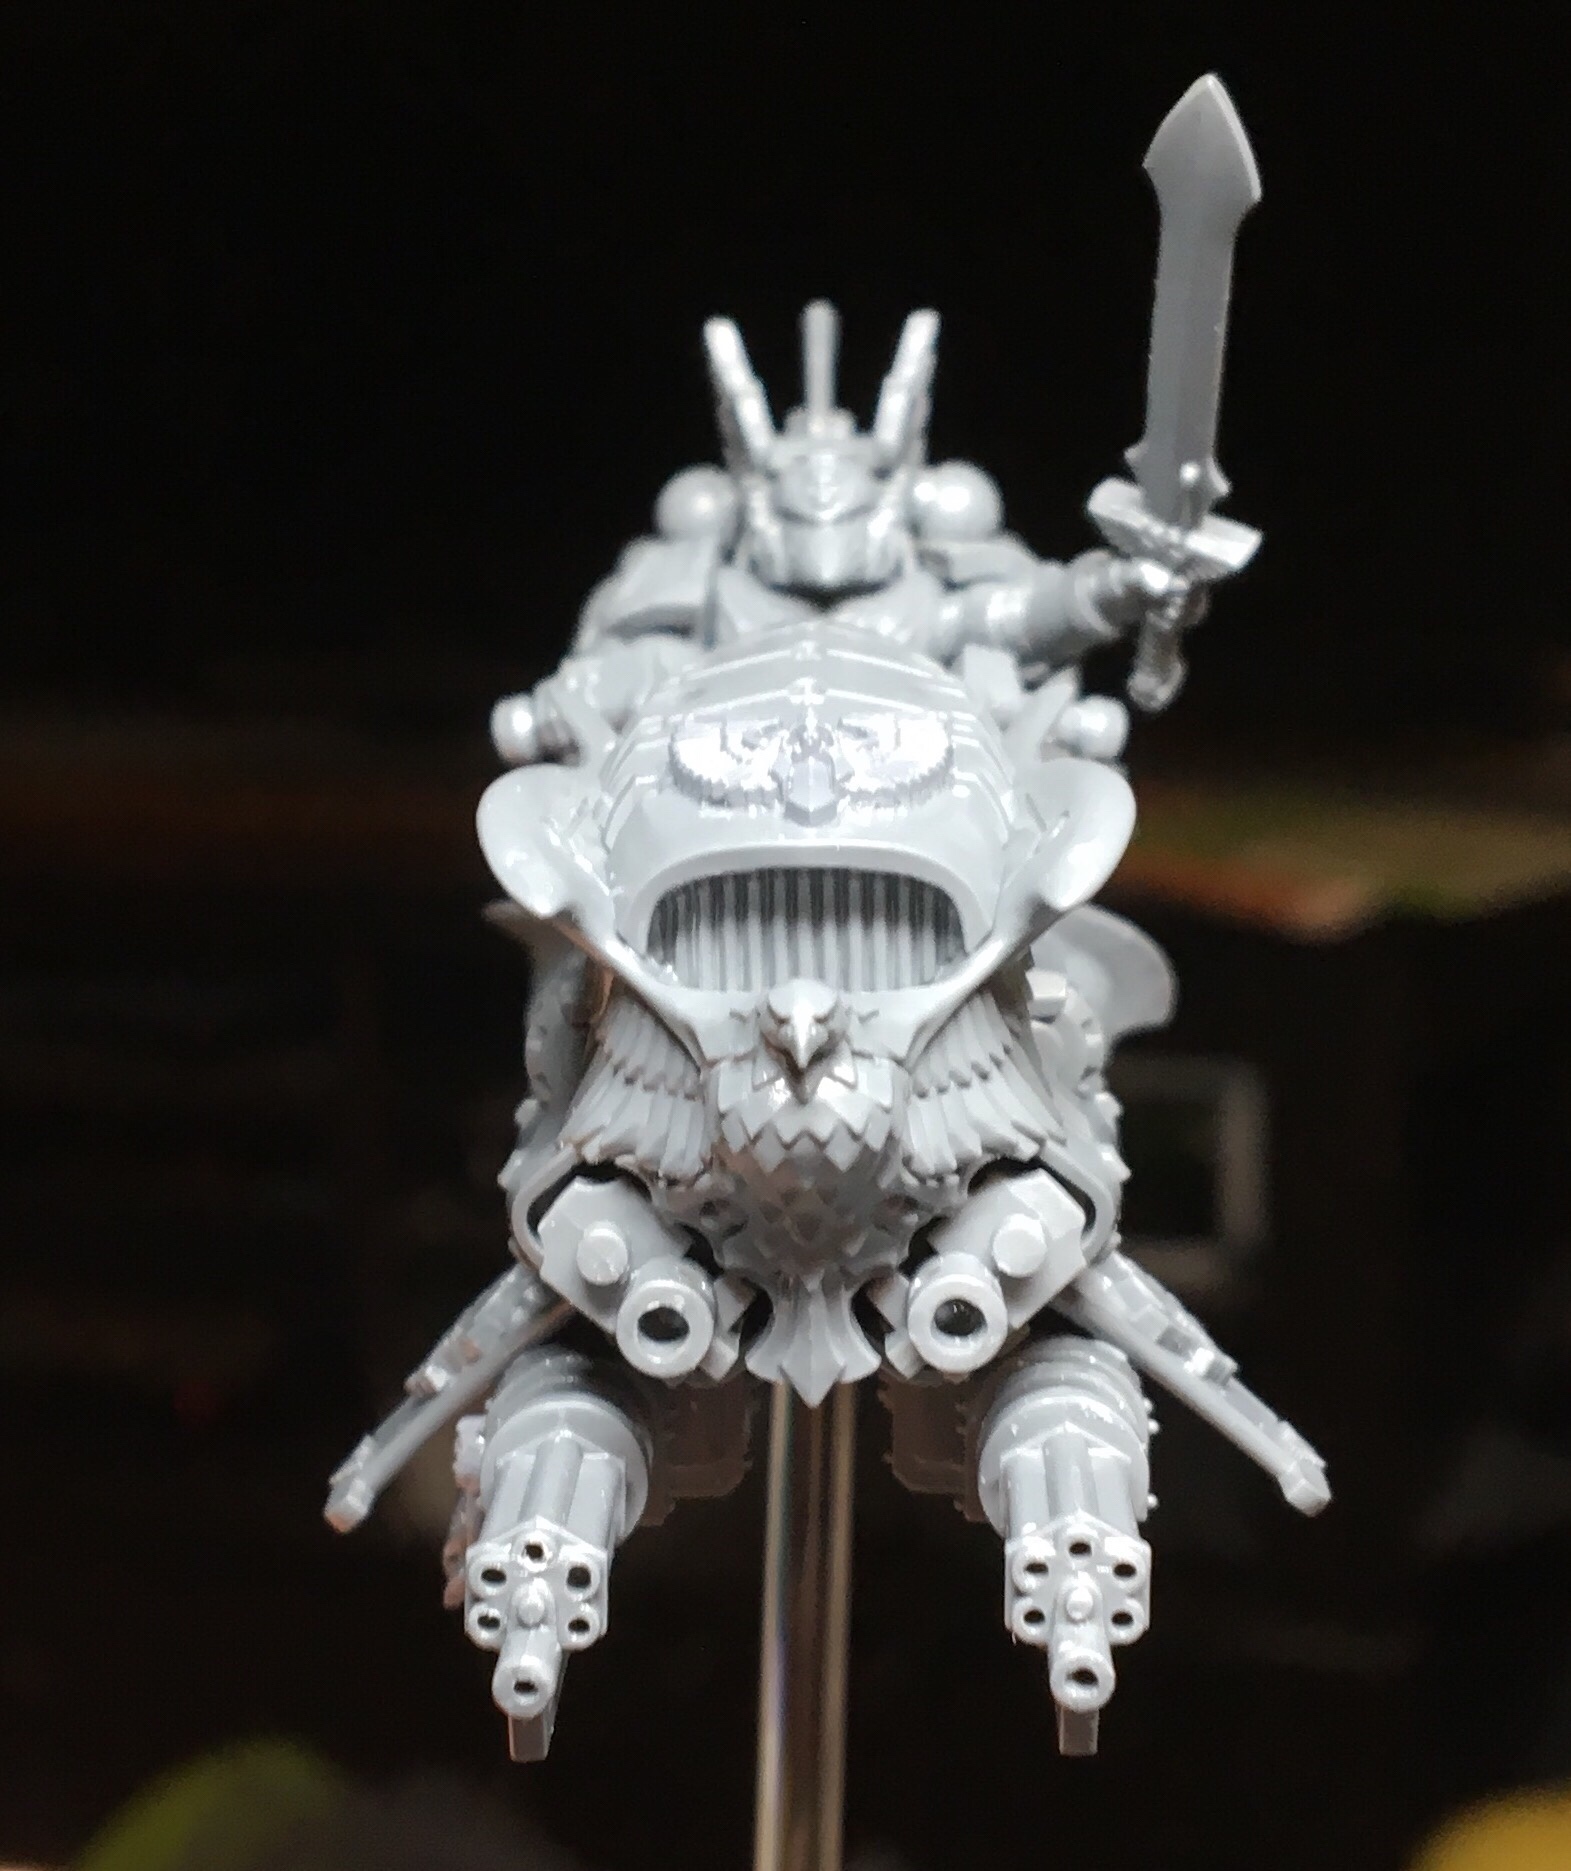
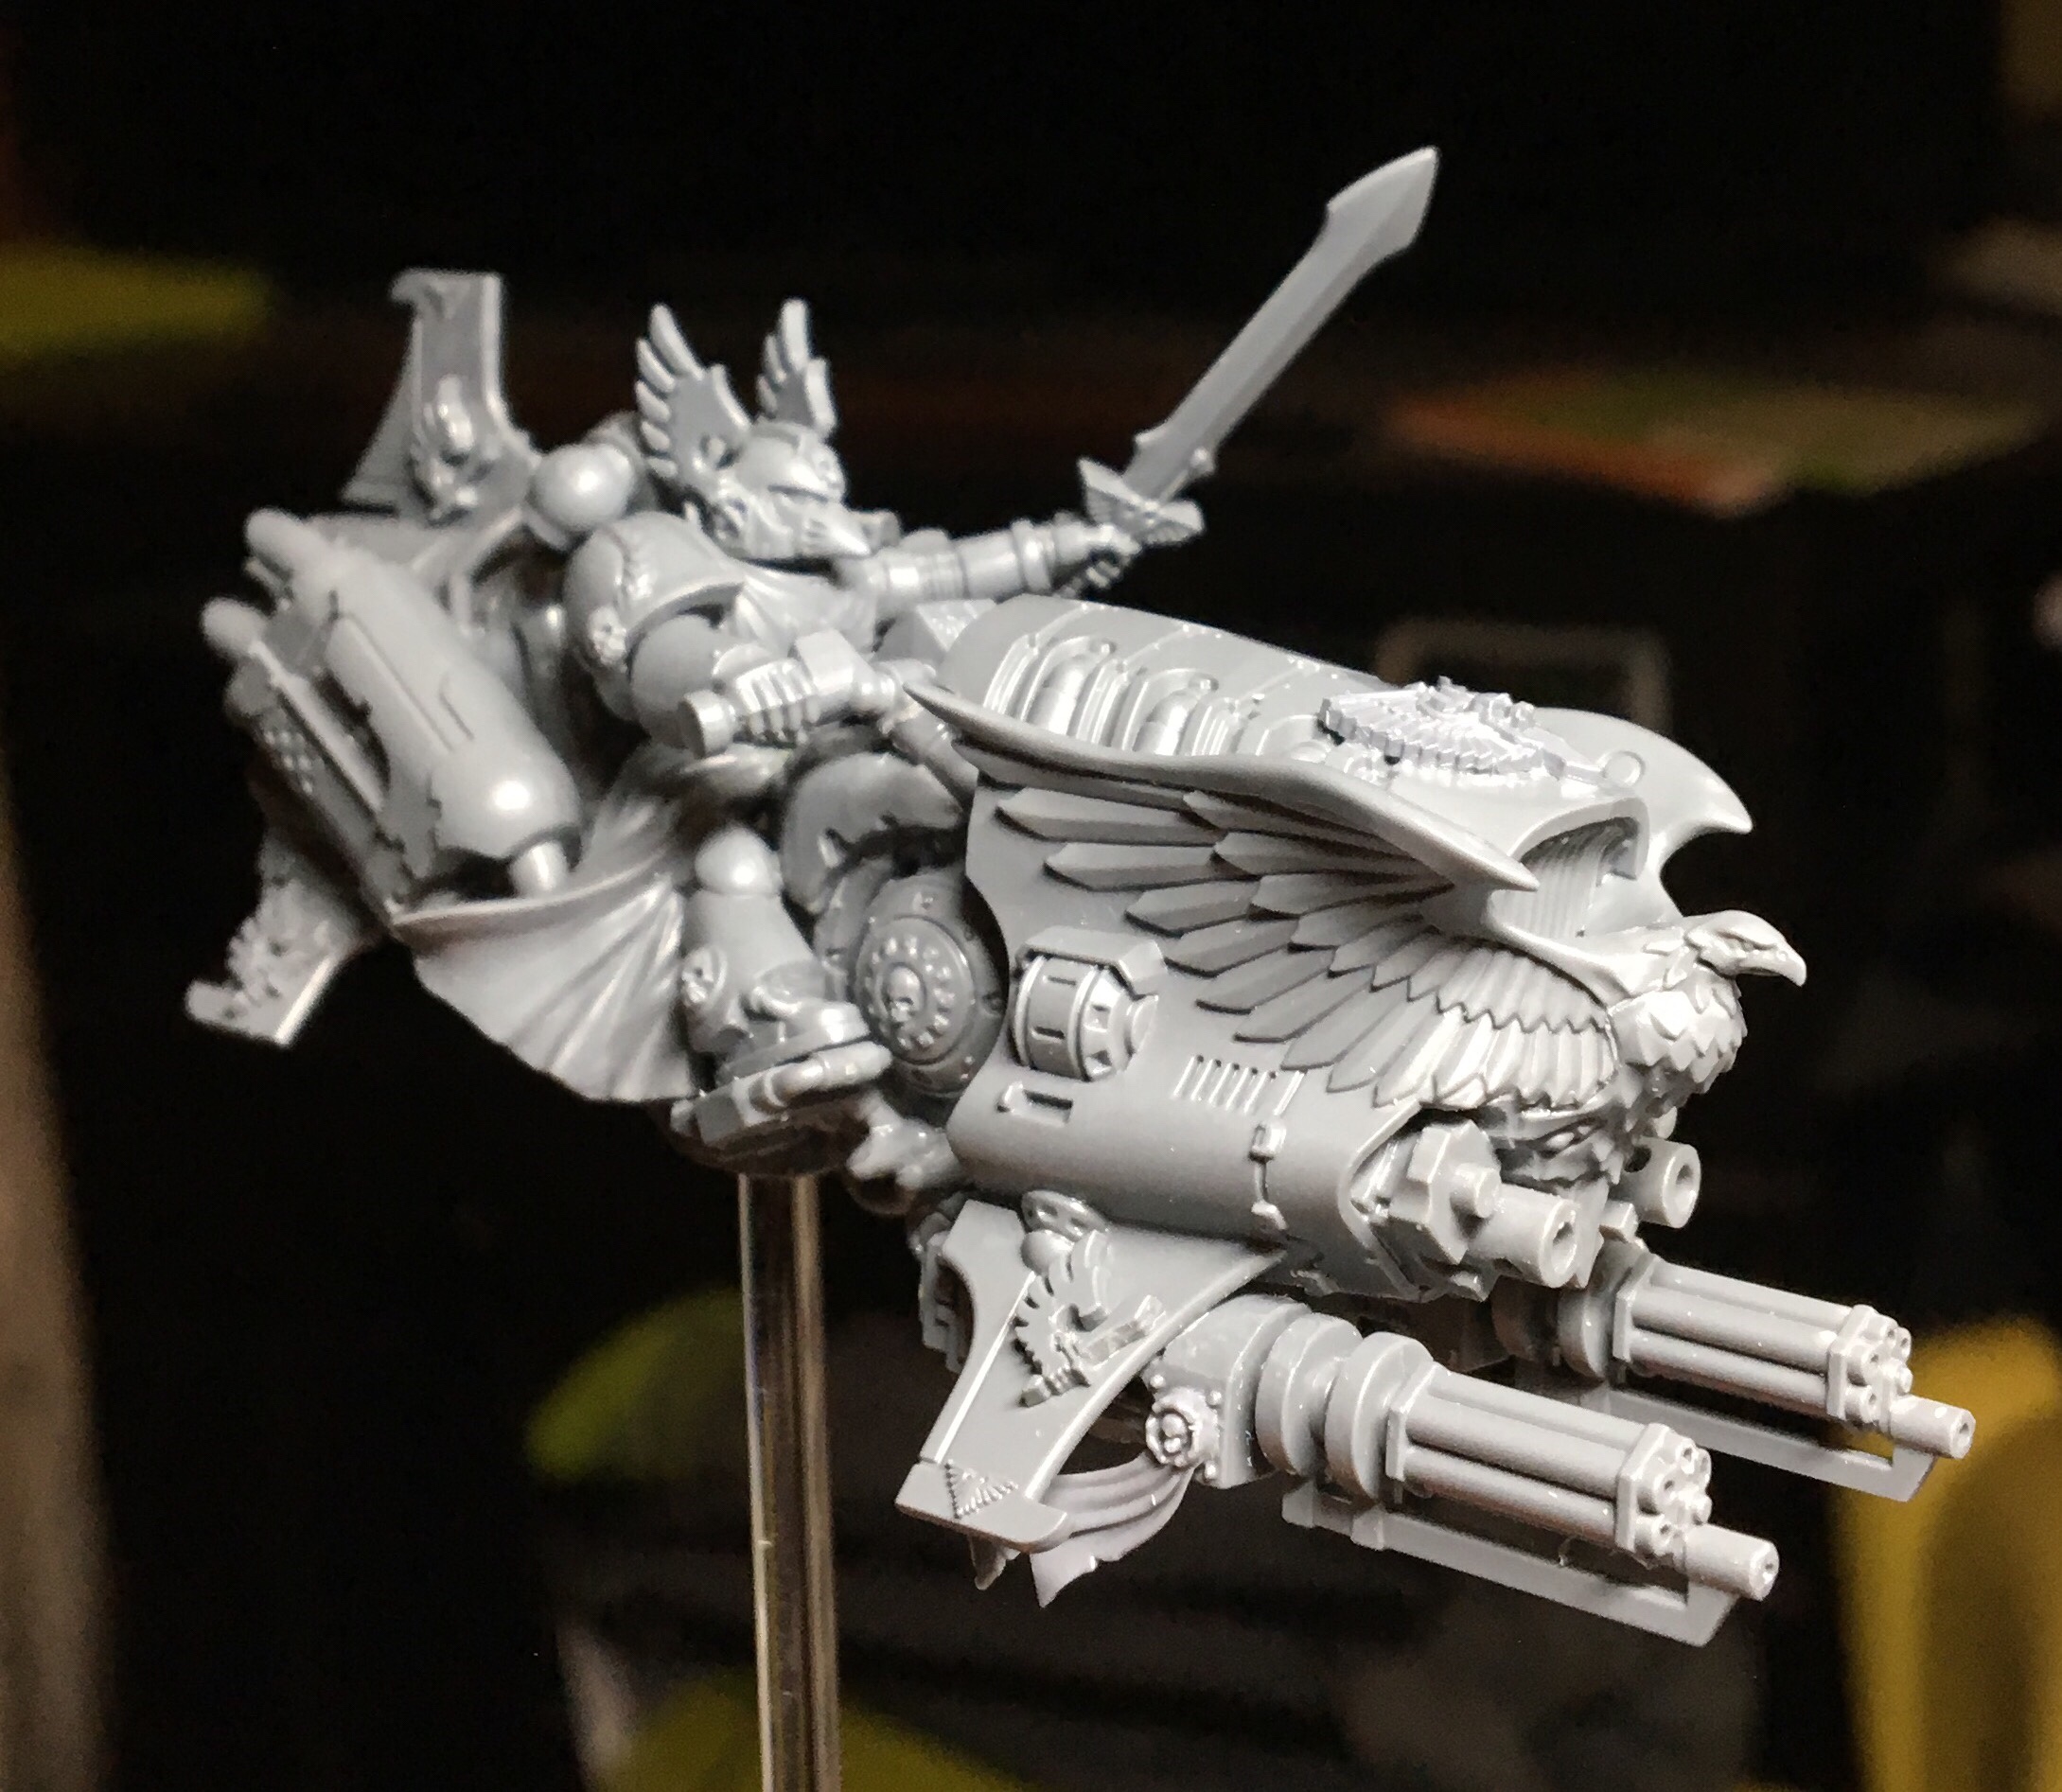
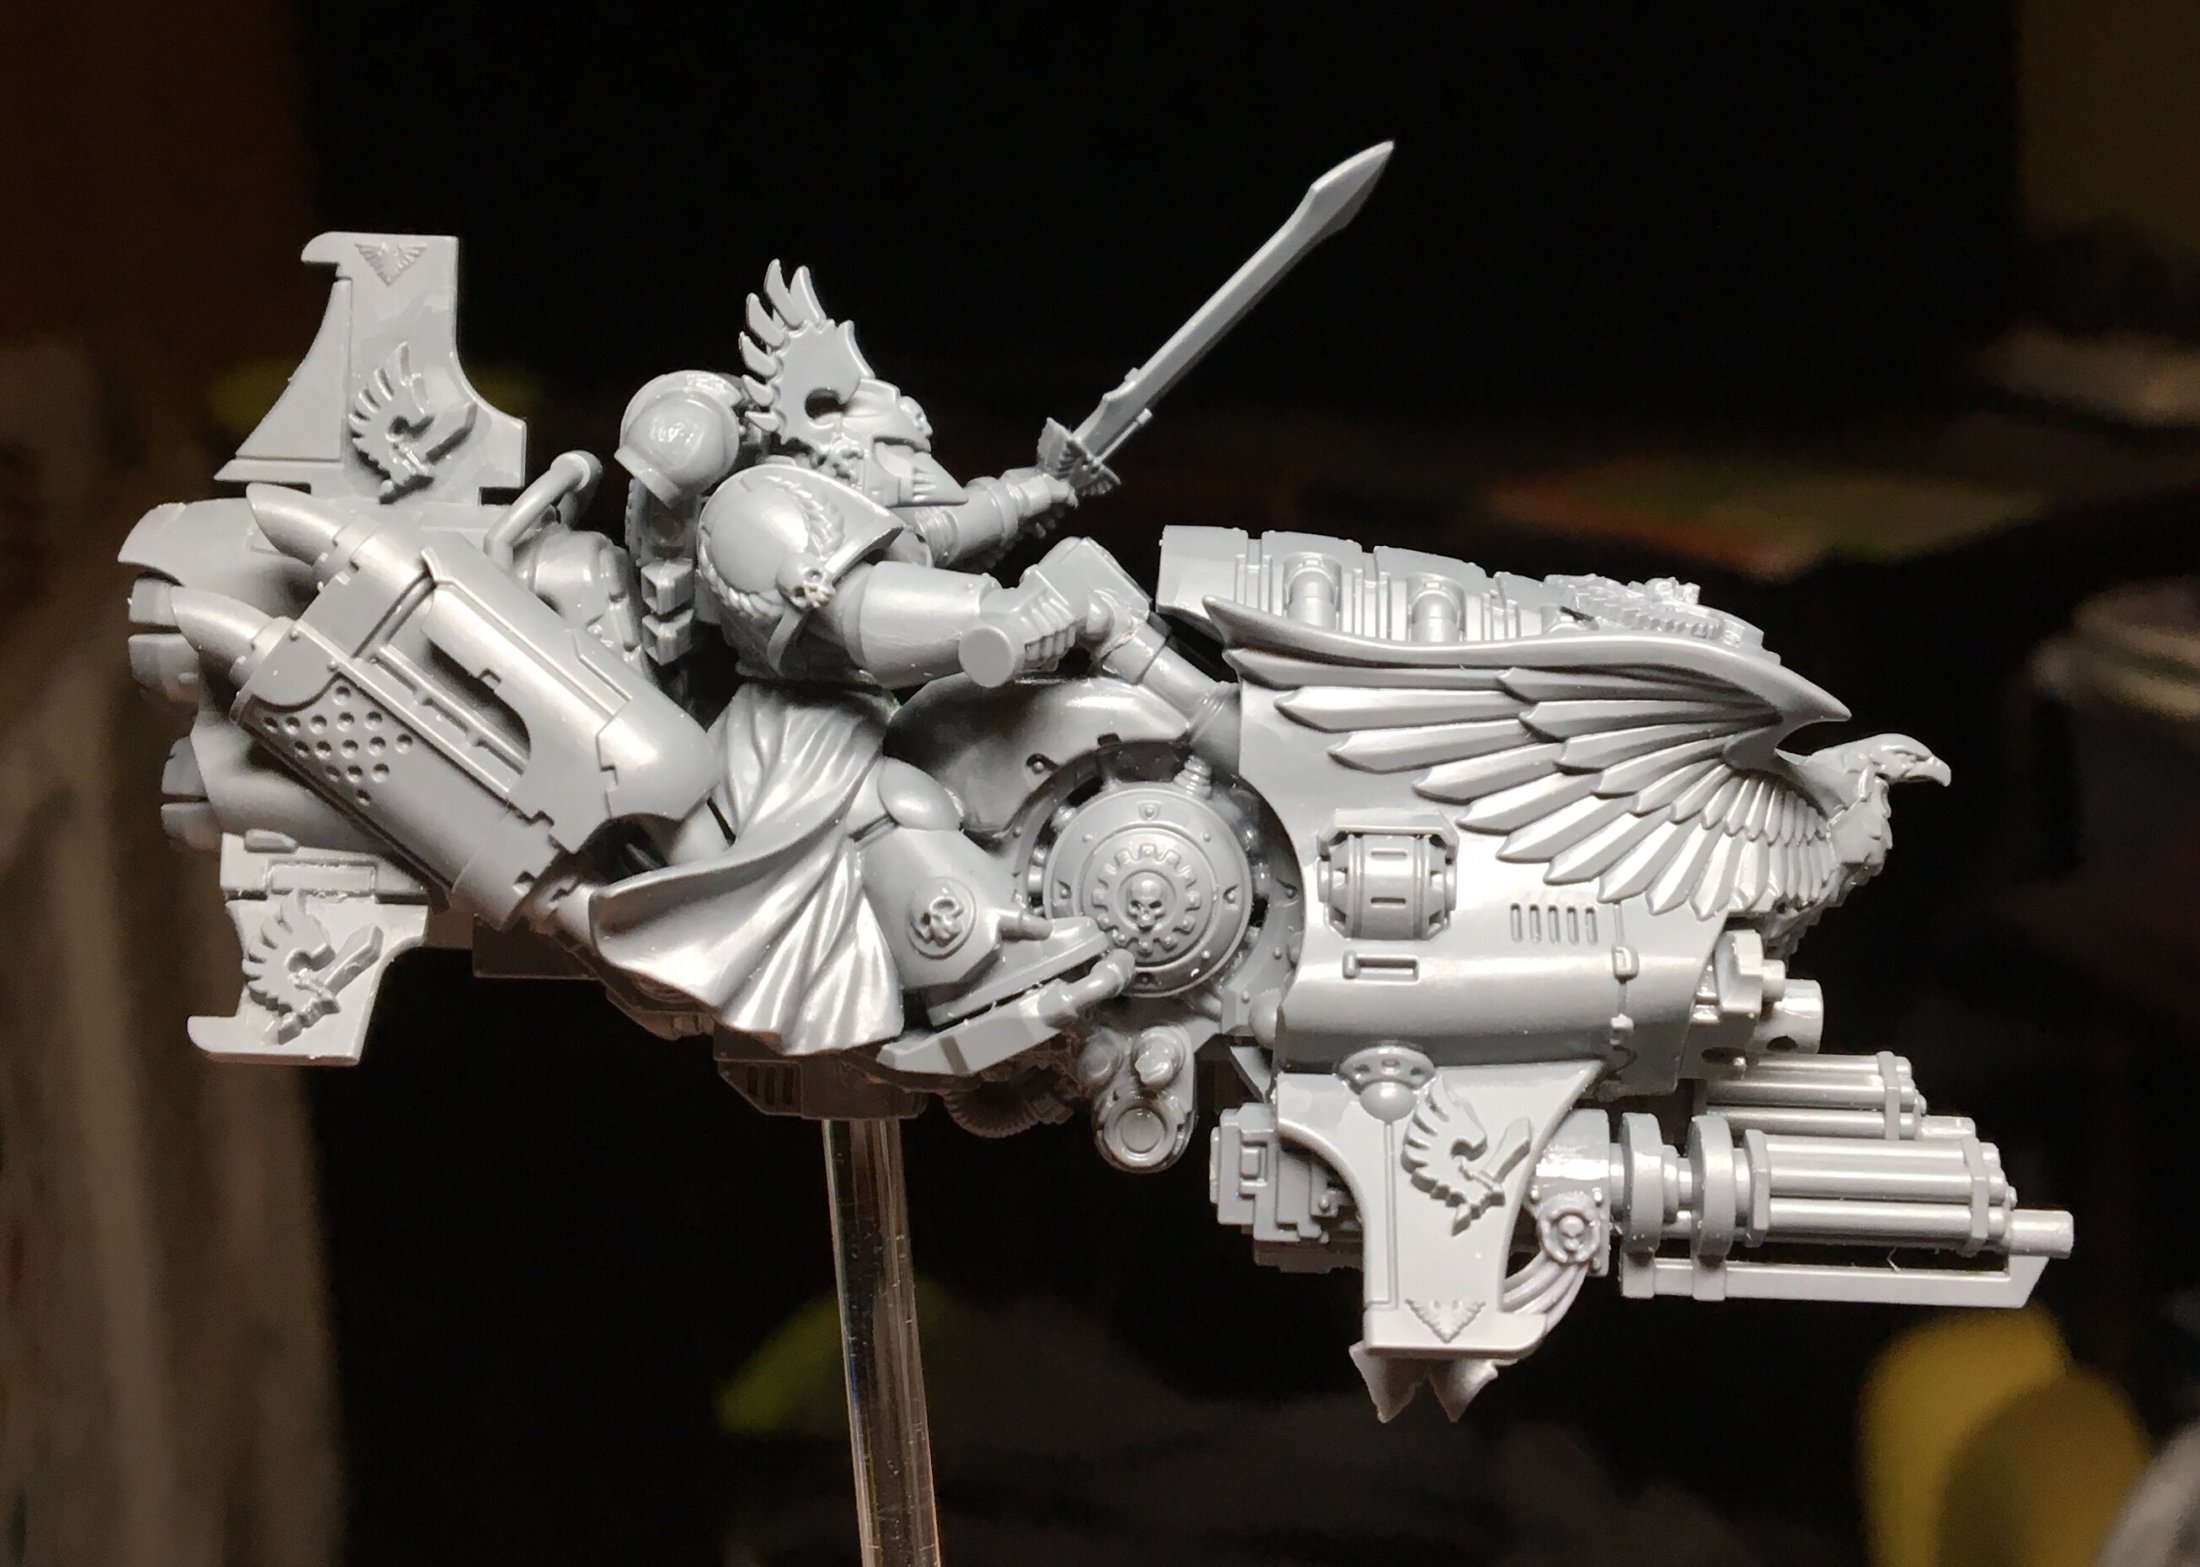
And here is the finished model. I am working on a Sammael conversion as well using the legs from the Ravenwing Command Squad, however that will require a lot more greenstuff sculpting of the robes as I said above. I’ll post photos of it when it’s finished.
Please feel free to ask any questions in the comments below.

So first you need to thin down the jetbike a little.
| Album | Ravenwing Talonmaster SBS |
| Category | Modeling |













Leave a Reply